Gather a few things See what you’ll need
- 160–220 gsm paper
- Ruler and scoring tool
- Scissors or craft knife with cutting mat
- Thin adhesive
- Silicone-coated release paper
- Dummy cards matching the intended contents
Choose an exercise 4 things to try as you read
Put the cards together first
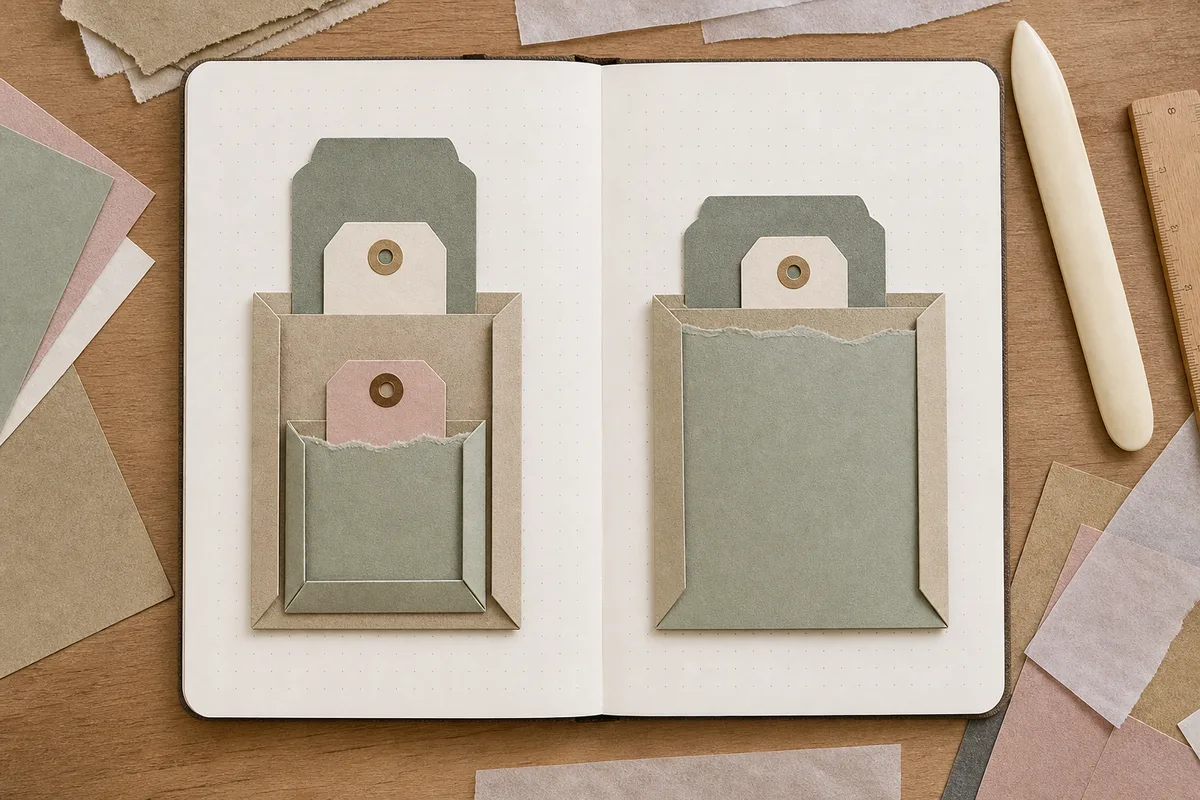
Put the pieces together as you mean to keep them: a folded note, its tab, and the cards behind it. Make a dummy bundle with the same thickness and corner shapes. Try its width before deciding that more depth is the answer; a front can bow because the mouth is squeezing the sides.
Allow the mouth at least 1/8 inch more width than the loaded bundle. If the whole stack already bends the loose journal sheet, use fewer pieces or a separate envelope. Extra folds won't make a fragile page carry more comfortably.
Compare the optionsIs the bundle asking for width, depth, or less weight?
Is the bundle asking for width, depth, or less weight?
Choose the problem seen in the loose paper trial before changing the gusset.
Read the words in this example
- bundle
- front
- Mouth width
Make the opening wider.
Check the bundle’s width before deepening any wall. The article allows at least ⅛ inch more mouth width than the loaded bundle. A narrow entrance can still bow even with generous depth, so widen the finished front or reduce the card width in a replaceable practice sample.
ONE WORKED EXAMPLE
The wall with a separate foot
Your folded note fits across a 4-inch-wide front, but it needs shallow depth. You have cut the 5 × 3½-inch practice blank and scored the three allowances.
Before
Both quarter-inch portions are folded flat against the backing. The front has no standing room, even though you cut the full allowance for a wall and tab.
After
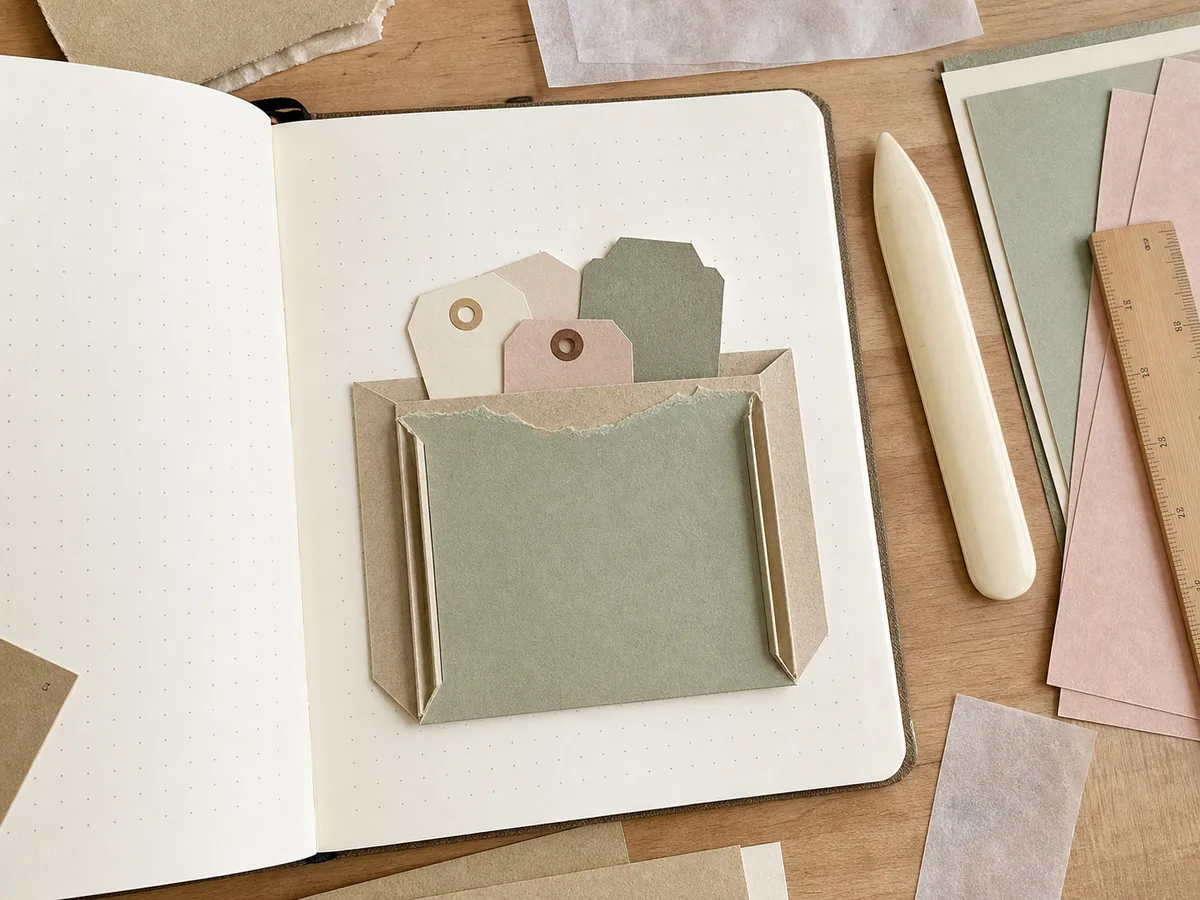
The paired scores fold in opposite directions. Each inner quarter-inch stands as a wall and each outer quarter-inch rests flat as a glue tab. After the bottom corner squares are removed, only those outer tabs attach to the backer.
What changed—and what to check
The two portions do different jobs. Keeping the wall free preserves depth while the flat outer tab gives the pocket a place to bond.
Try this check. Before gluing, point to each standing wall and separate flat tab while the dummy bundle is in place.
Something for a future page?
The Washi Tape ShopAffiliate links: we may earn a commission if you buy through these links.
Cut a 4 × 3-inch practice pocket
For a finished front measuring 4 inches wide by 3 inches high, cut a 5 × 3.5-inch rectangle. Keep the top edge unscored as the opening. Score the left, right and bottom edges twice: at 1/4 inch and 1/2 inch from each outer edge.
Think of each half-inch allowance as a wall with a little foot. The quarter-inch beside the front stands up; the outer quarter-inch folds the opposite way and lies flat on the backing. That flat foot is the glue tab. Test the folds against loose backing so you can see the space before any adhesive fixes it.
See the differenceKeep the front intact while separating the bottom allowances
Keep the front intact while separating the bottom allowances
Switch from the scored blank to the same net with only its two bottom corner squares removed.
Read the words in this example
Scored rectangular blank
- 4 × 3 in front
- 5 × 3½ in blank
Scored rectangular blank
The 5 × 3½ inch blank includes a 4 × 3 inch front. Each side and the bottom has a ½-inch allowance, scored at ¼ and ½ inch from the outer edge.
Keep the bottom corners smooth
Before folding, remove the 1/2 × 1/2-inch square at each bottom corner, cutting along the inner score lines without cutting into the 4 × 3-inch front. This separates the side allowances from the bottom allowance. Fold each remaining allowance into its quarter-inch wall and quarter-inch attachment tab. The wall edges meet at the bottom corners; any extra trimming belongs only on the outer glue tabs.
Glue the flat tabs, not the walls
Hold the folded pocket against a loose backing and try the dummy bundle before gluing. If the front bows sharply, first remove a card or make the finished pocket wider. Start with the quarter-inch walls; a deeper wall can add thickness without curing a tight mouth.
Apply narrow tape or a controlled glue line only to the outer tabs. Keep adhesive out of the standing walls and folds. Attach the tabs to the page away from the spine, using release paper inside to keep stray adhesive from catching the front. Let the adhesive dry or cure as directed before loading.
Try a what-ifThe pocket fits, but a tall tab exceeds the cover
The pocket fits, but a tall tab exceeds the cover
Check the loaded outline as well as the space inside.
Your dry trial pocket holds the bundle comfortably across its width and depth. The tallest card’s tab projects above the journal cover, while there is unused page space below the loose pocket.
Compare the three choices
What would you try before attaching the pocket?
- Move the loaded pocket lower and recheck the closed book
Lowering the whole trial can bring the tall tab inside the page block without changing the working channel. Keep the opening reachable and check all outer edges.
- Make the standing walls deeper
Depth accommodates thickness, but it does not shorten the card or lower its exposed tab.
- Narrow the pocket front
A narrower front changes the fit across the cards while leaving the projecting height unresolved.
Judge the complete loaded shape against the book before fixing a holder in place.
What would you try?
Choose an option to see what it would do. You can explore all three.
Try the pocket in the closed book
Insert the dummy cards, close the journal gently, reopen it and turn the loaded page. Pull the cards out again. They should reach the bottom without grinding against a hidden glue bead, and the facing page should stay free of a hard pressure mark.
If the mouth gapes, lighten the contents or try a wider pocket before making it deeper. A move from 1/4-inch to 3/8-inch walls needs a new cutting allowance and another closed-book trial. It isn't a reason to force more into the first pocket.
GO A LITTLE FURTHERSave the good fold, or make a fresh one
Save the good fold, or make a fresh one
A lifted outer tab can sometimes be reinforced with a narrow paper strip, provided the wall beside it still opens. Keep the patch outside the fold and protect the interior while it dries. A wall glued flat, however, needs a fresh pocket; more glue will only hold it flatter.
For a hard bottom lump, make a fresh pocket rather than cutting into the one attached to the page. Slightly round the leading corners of replaceable test cards if they catch, then try the loaded page turn again. Keep decoration light at the mouth; the little space you made is there for these few pieces.
Compare the optionsWhich gusset part needs the repair?
Which gusset part needs the repair?
Choose the fault and keep the standing fold free to do its job.
Read the words in this example
- Front
- Wall
- Patch on tab
- Backing
Patch that tab outside the moving fold.
A narrow exterior paper strip may extend the bond if the neighboring wall still opens normally. Keep the patch out of the wall and crease, protect the interior, and let it dry before loading. A repair that glues the standing wall flat would remove the depth you built.
Where this idea began
Justine Jenkins's notebook pocket supplies the three-sided 1/2 in gusset, angled corner cuts, gusset-only attachment, and storage use summarized in Materials.
Want to explore the techniques a little further? Here are the maker tutorials and references behind this guide.
- Construction referenceJustine Jenkins: How to Make a Quick & Easy Notebook
Justine Jenkins’s notebook pocket supplies the half-inch gusset, corner cuts, and gusset-only attachment.