Gather a few things See what you’ll need
- An ordinary dark pen
- A journal page with real notes on it
- Scrap paper
Choose an exercise 3 things to try as you read
What are you always looking for?
Open a recent page and think about the last time you searched it. Were you hunting for an unfinished task, an idea, a date, or something someone promised to send? That repeated search is a useful place to start.
For example, put the Waiting Hourglass beside a note about a quote you’ve requested. Keep the person’s name and the expected reply day in writing beside it. The picture helps you find the line; the words tell you what you need to know once you get there.
Try the exampleGive the note you lose a visible cue
Give the note you lose a visible cue
Choose a waiting mark, idea bulb, or finished spark. Resize it beside the words until the cue has room without becoming the whole entry.
Read the words in this example
- A drawing beside words
- Your words
- WAITING ON
- Separate drawing and writing areas
- Dashed box shows the drawing footprint.
The drawing footprint stays clear of the reserved writing area.
The longer side of “Waiting Hourglass Mark” uses 32% of the inner page width; its proportions stay intact. The reserved area still contains four sample writing rules. The dashed footprint includes empty space around the strokes; it flags layout overlap, not an exact ink collision or handwritten capacity. The picture helps you find the line. Keep the person, promised day, idea, or actual finish in writing beside it; these are optional personal cues.
- Drawing, longer side
- 32%
- Drawing footprint width
- 32%
- Gap across inner page
- 9.3%
- Reserved sample rules
- 4
ONE WORKED EXAMPLE
The reply arrived; the decision has not
You asked Lee for a printing quote and marked the request with an hourglass. The reply arrives before you have time to compare the price.
Before
The hourglass still suggests a missing reply, although the actual unfinished work is deciding whether the quote fits your budget.
After
The original line now reads “Lee: quote received Thursday.” Its waiting mark is closed. A separate live task says “Compare Lee’s printing quote with the display budget,” with a reference to the message.
What changed—and what to check
Receiving information and acting on it are different events. Two clear lines let the waiting cue remain reliable without losing the decision it created.
Try this check. Find the old request, then point to the separate place where the price decision remains visible.
Keep the marks you already understand
Keep any dots, crosses, or arrows you already use for task status. An idea bulb can sit at the far end of a line while the usual bullet stays at the beginning. The two marks have different jobs: one helps you find the subject; the other says what happened to the task.
These decorative shapes are custom designs, not an official notation system. Choose one useful addition before giving another shape a job. A small written “waiting” is enough if the drawing makes the line harder to read.
Give one drawing a real sentence
Browse the twelve examples below and choose the one that matches your search. Press Draw it to watch the order, or move through the steps one at a time. Copy it on scrap paper before putting it beside an entry you want to find again.
Give yourself enough room for the open parts of the shape. A bulb needs space in its neck; an hourglass needs a visible waist. Start around 35–45 mm wide for practice, then simplify or resize the drawing to fit comfortably beside your handwriting.
Let the words finish the job
A moved-task mark belongs on the old line after the task exists in its new home. Write the destination date or page beside it, and follow that reference once. A neat arrow cannot repair a missing destination.
A received reply can end a wait without finishing the work it creates. For “Lee: quote received,” close the waiting note; if the price needs checking, put “Compare Lee’s quote with budget” in your task list. Let each mark describe the particular event it records.
Try a what-ifReady to collect is not back in your hands
Ready to collect is not back in your hands
Use the meaning you gave this waiting mark.
Your hourglass means “borrowed book not yet returned.” Your friend messages that the book is ready for you to collect, but you have not collected it.
Compare the three choices
Which note keeps that meaning accurate?
- Close the hourglass because the friend has replied.
The reply arrived, but this particular mark tracks the book’s return. Those are different finishing points.
- Keep the wait open and add the collection arrangement.
The book is still away. Record where or when to collect it, and close this wait when the book is actually back.
- Replace the hourglass with a completed-task spark.
A completion cue would describe more than has happened. You can record the reply without marking the return complete.
Close a mark when its named condition is met, not merely when something related happens.
What would you try?
Choose an option to see what it would do. You can explore all three.
GO A LITTLE FURTHERLeave some ordinary lines ordinary
Leave some ordinary lines ordinary
It’s tempting to mark everything once you’ve learned a few new shapes. But when every line has an hourglass, flag, face, or spark, there’s less difference for your eye to notice. Try reserving your new mark for the situation that brought you here.
You can still enjoy drawing the others on a practice page. They don’t all need jobs in your daily notes. If two shapes seem to mean nearly the same thing, keep the one you recognize fastest. A mark should feel familiar before it becomes part of a routine.
Try finding the note with the book closed first
Before your next look, name what you want to find: “the quote from Lee,” for example. Open the page and see whether the cue leads you there without reading every line. If you have to decode it, add a word or simplify the shape.
Keep the cue for one more relevant entry, then compare the two searches. You are deciding whether this particular mark earns its space, not whether you can remember a whole gallery.
Compare the optionsWhat happened when you came back?
What happened when you came back?
Choose what you notice on a reread. The useful repair may be fewer marks, a written word, or simply keeping the cue you already understand.
Read the words in this example
- Reply from Lee
Keep the same cue for the same meaning.
A cue that takes you straight to the waiting reply is doing its job. Keep its meaning steady on the next relevant page, and keep the name or promised day in words. You do not need to add the other designs to make the system complete.
Pick a drawing and follow along
Choose a drawing below. Watch the whole shape appear, or tap a numbered step to see just that part. The faint outline is there if you’d like a little guidance.
Pick a drawing. We’ll take it one stroke at a time.
Checked Task Spark
A generous task square holds a decisive rising check. One small four-point spark celebrates the finish. Original optional variant; the official completed-task mark is X.
Original optional variant · the official completed-task mark is XThe finished drawing. Watch it once, then try one step at a time.
Let’s draw it together.
Give it a place.Add it beside the one completed task that changed the day, such as a submitted application or finished draft.
If the line wandersKeep the check inside the square. If the spark crowds the corner, move the spark outward and keep its shape.
Moved-Forward Relay
An open origin ring leads through one clean elbow to a new landing dot. The arrow points to the day receiving the item. Official migrated meaning; this ring-to-dot relay is an original treatment.
Official migrated meaning · original ring-to-dot relayThe finished drawing. Watch it once, then try one step at a time.
Let’s draw it together.
Give it a place.Use it beside an unfinished task only after you have copied that task to its new day.
If the line wandersStop the arrow before the landing dot. Widen that gap before changing the elbow.
Cancelled Reason Bubble
A broad speech bubble keeps two short reason lines readable beneath a single cancellation slash. Original optional cancellation variant.
The finished drawing. Watch it once, then try one step at a time.
Let’s draw it together.
Give it a place.Place it beside a cancelled plan and write a brief reason, such as “venue changed,” on the two lines.
If the line wandersUse only one slash. Keep its lower crossing to the right of the bubble’s tail so the tail stays readable.
Focus-Dot Diamond
One dark dot sits in a spacious diamond. The four clear points isolate a fact without borrowing the official priority star. Original optional focus mark, distinct from official *.
Original optional focus mark · deliberately distinct from official *The finished drawing. Watch it once, then try one step at a time.
Let’s draw it together.
Give it a place.Put it beside the one fact that changes your next decision, such as a fixed launch date.
If the line wandersAim the side corners at the same height. Keep the center open instead of adding correction lines.
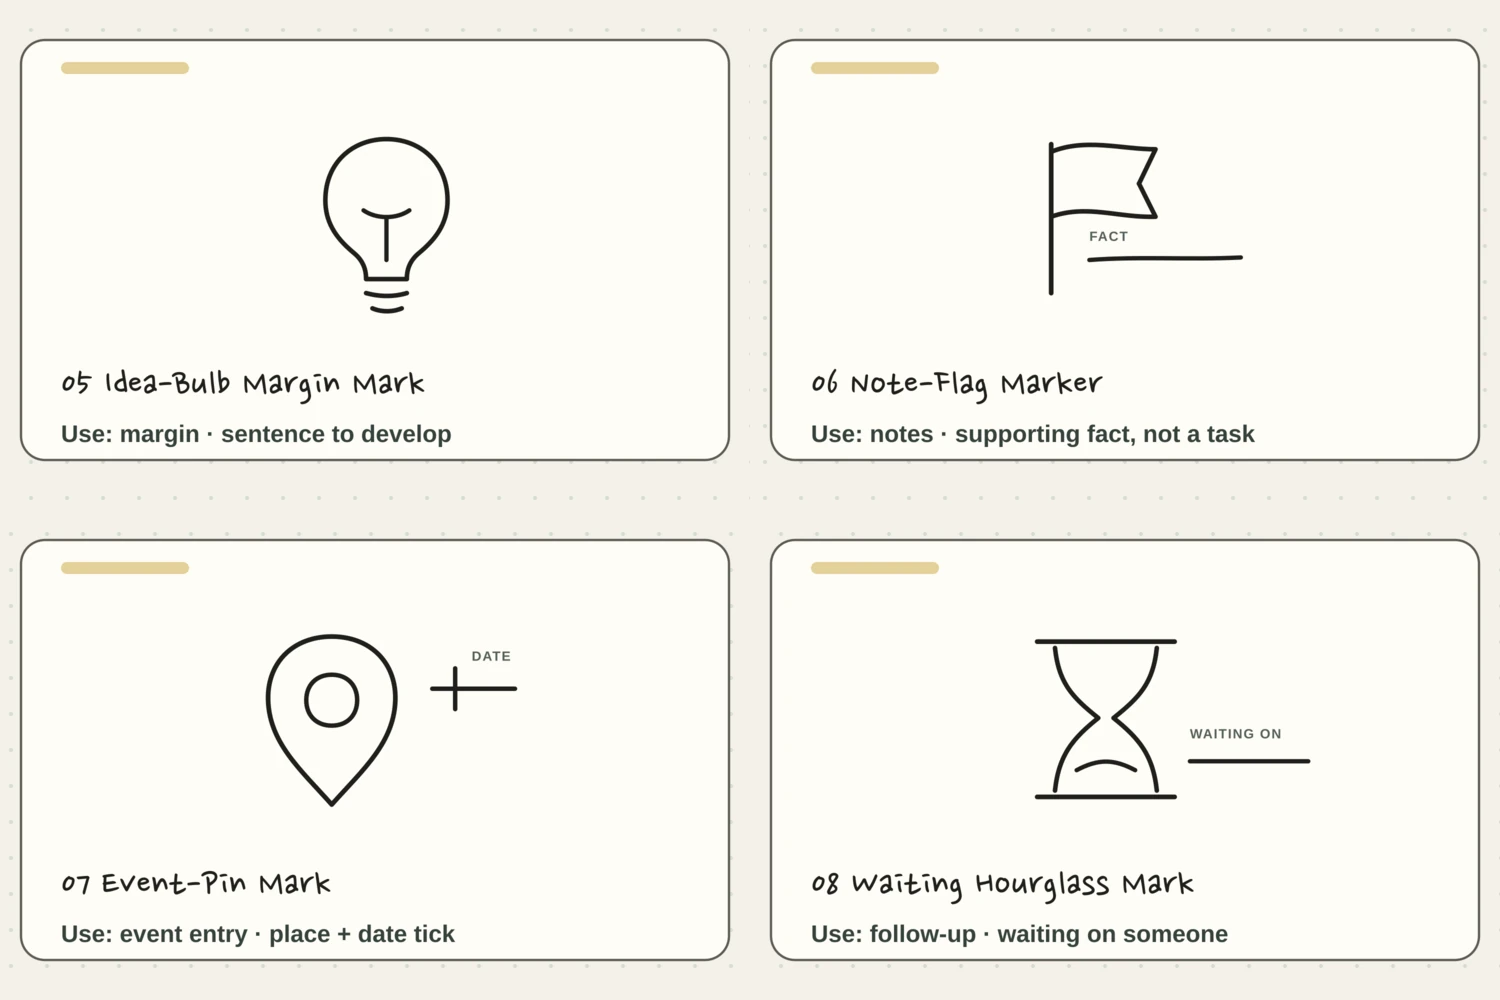
Idea-Bulb Margin Mark
A rounded bulb, an open filament, and two compact base lines make an idea easy to find. Original optional bulb; the official inspiration signifier is !.
Original optional bulb · the official inspiration signifier is !The finished drawing. Watch it once, then try one step at a time.
Let’s draw it together.
Give it a place.Mark a sentence worth another draft, sketch, or experiment so it survives the page turn.
If the line wandersLeave a little white paper between the neck and the first base line. A wider bulb works better than a cramped filament.
Note-Flag Marker
A shallow waving flag introduces one open fact rail. The FACT guide label identifies a supporting detail. Official note meaning uses a dash; this flag is an original treatment.
Official note meaning uses a dash · original flag treatmentThe finished drawing. Watch it once, then try one step at a time.
Let’s draw it together.
Give it a place.Write one useful detail above the rail, such as “Doors open 18:30.” It can matter without becoming a task.
If the line wandersKeep the flag shallow and the writing rail long. Do not add folds to repair a crowded flag.
Event-Pin Mark
A clear place pin pairs with a separate date rail and one date tick. Official event bullet is O; this place-and-date variant is original.
Official event bullet is O · original place-and-date variantThe finished drawing. Watch it once, then try one step at a time.
Let’s draw it together.
Give it a place.Use it beside an event name, then write its day or date over the tick.
If the line wandersKeep the pin’s inner circle round and well above the point. Leave the date field separate from the pin.
Waiting Hourglass Mark
An open hourglass sits beside a spacious WAITING ON field. The narrow waist and one low sand curve make the pause legible. Original optional waiting mark.
The finished drawing. Watch it once, then try one step at a time.
Let’s draw it together.
Give it a place.Use it beside an item awaiting a reply, and put a name or promised day above the field.
If the line wandersKeep a gap at the waist. If the glass looks pinched, bow the sides outward rather than darkening the middle.
Recurring Loop Mark
A broad open arrow circles one item dot. Two small count ticks sit above the loop. Original optional recurring mark.
The finished drawing. Watch it once, then try one step at a time.
Let’s draw it together.
Give it a place.Add it beside an item that returns, such as watering herbs. The two ticks can record two completed returns.
If the line wandersLeave the loop open at the arrowhead. Keep the count ticks above its highest curve.
Quick Mood Face
A calm, broad face sits beside three equal intensity cells. The middle cell is selected for a steady feeling. Original optional mood mark.
The finished drawing. Watch it once, then try one step at a time.
Let’s draw it together.
Give it a place.Add it to an evening line and dot LOW, MID, or HIGH to record how strongly you felt the mood.
If the line wandersKeep the mouth shallow and leave a broad gap before the cells. All three cells should stay the same size.
Call-Back Mark
A shaped telephone receiver pairs with one separate completion check. The open bends at both ends keep the receiver recognizable. Original optional follow-up mark.
The finished drawing. Watch it once, then try one step at a time.
Let’s draw it together.
Give it a place.Put it beside a promised call after the conversation has happened and the follow-up is closed.
If the line wandersKeep each receiver end wider than the middle. Give the check its own clear space at the right.
Finished Spark Check
One short writing rail flows into a broad completion check. Four separate open rays make a restrained finishing glint. Original optional finish variant; the official completed-task mark is X.
Original optional finish variant · the official completed-task mark is XThe finished drawing. Watch it once, then try one step at a time.
Let’s draw it together.
Give it a place.Use it to end the line for a shipped zine, submitted portfolio, or finished repair.
If the line wandersKeep the check and glint apart. Leave the center of the glint open instead of joining its rays.
Something for a future page?
The Washi Tape ShopAffiliate links: we may earn a commission if you buy through these links.
Where this idea began
Bullet Journal’s Rapid Logging FAQ identifies a dot for tasks, O for events, and a dash for notes. It lists X for a completed task, > for a migrated task, and < for a scheduled task; its signifier examples include * for priority, ! for inspiration, and an eye for explore. The twelve illustrated combinations above are original optional variants, not replacements presented as official notation.
Want to explore the techniques a little further? Here are the maker tutorials and references behind this guide.
- Method referenceBullet Journal: What is Rapid Logging? Understand Rapid Logging, Bullets, and Signifiers
Official meanings for tasks, events, notes, status changes, and signifiers; decorative variants remain optional.
- Website implementationW3C: Pause, Stop, Hide for moving content
W3C guidance informs animation pause controls, not the craft or writing method.
- Website implementationMDN: SVG stroke-dashoffset
SVG stroke-dashoffset documentation explains the on-page stroke animation, not a drawing method.