Gather a few things See what you’ll need
- Two contrasting thin papers
- Ruler and pencil
- Scissors
- Glue stick
- A spare backing sheet
Choose papers that can bend without fighting
Use two thin papers of similar weight, such as a plain colored sheet and a quiet magazine page. Very brittle paper breaks at the turns; thick card makes a raised checkerboard. Test each by bending a narrow offcut around your finger before preparing the whole panel.
For a first attempt, choose a clear light-dark difference. Patterned paper can wait until you can see the crossings easily. The example uses a 10 × 12 cm light base and 1 cm-wide dark strips. These dimensions produce a manageable journal decoration, not a structural pocket or a reinforced book cover.
Keep the base connected at both ends
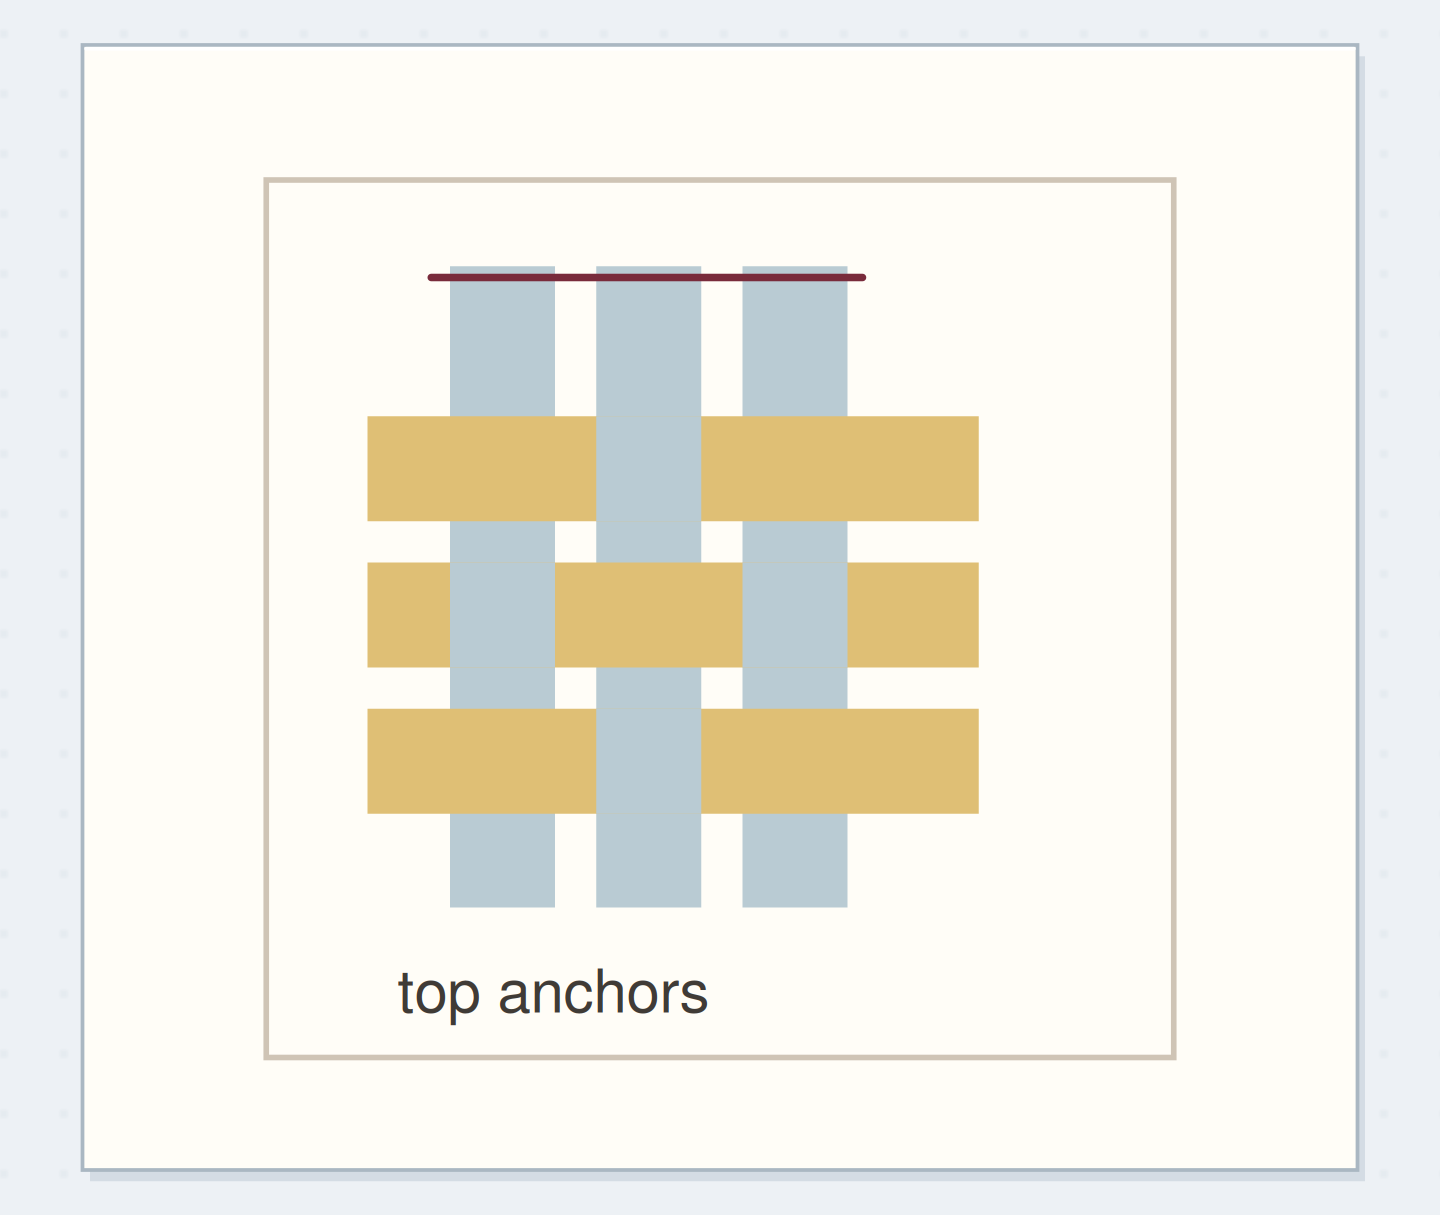
With the base upright, draw horizontal stop lines 1 cm from the top and bottom. Fold it gently across its middle so the top and bottom edges meet. Cut parallel slits from the folded edge toward the stop lines, spacing them 1 cm apart and stopping before the uncut margin.
Open the sheet. The slits should run vertically between two intact borders. Those connected bands are your warp. Cut several 1 cm-wide strips from the second paper, long enough to extend slightly beyond both sides of the base. These loose strips are the weft that you will move across the warp.
Watch the crossings change row by row
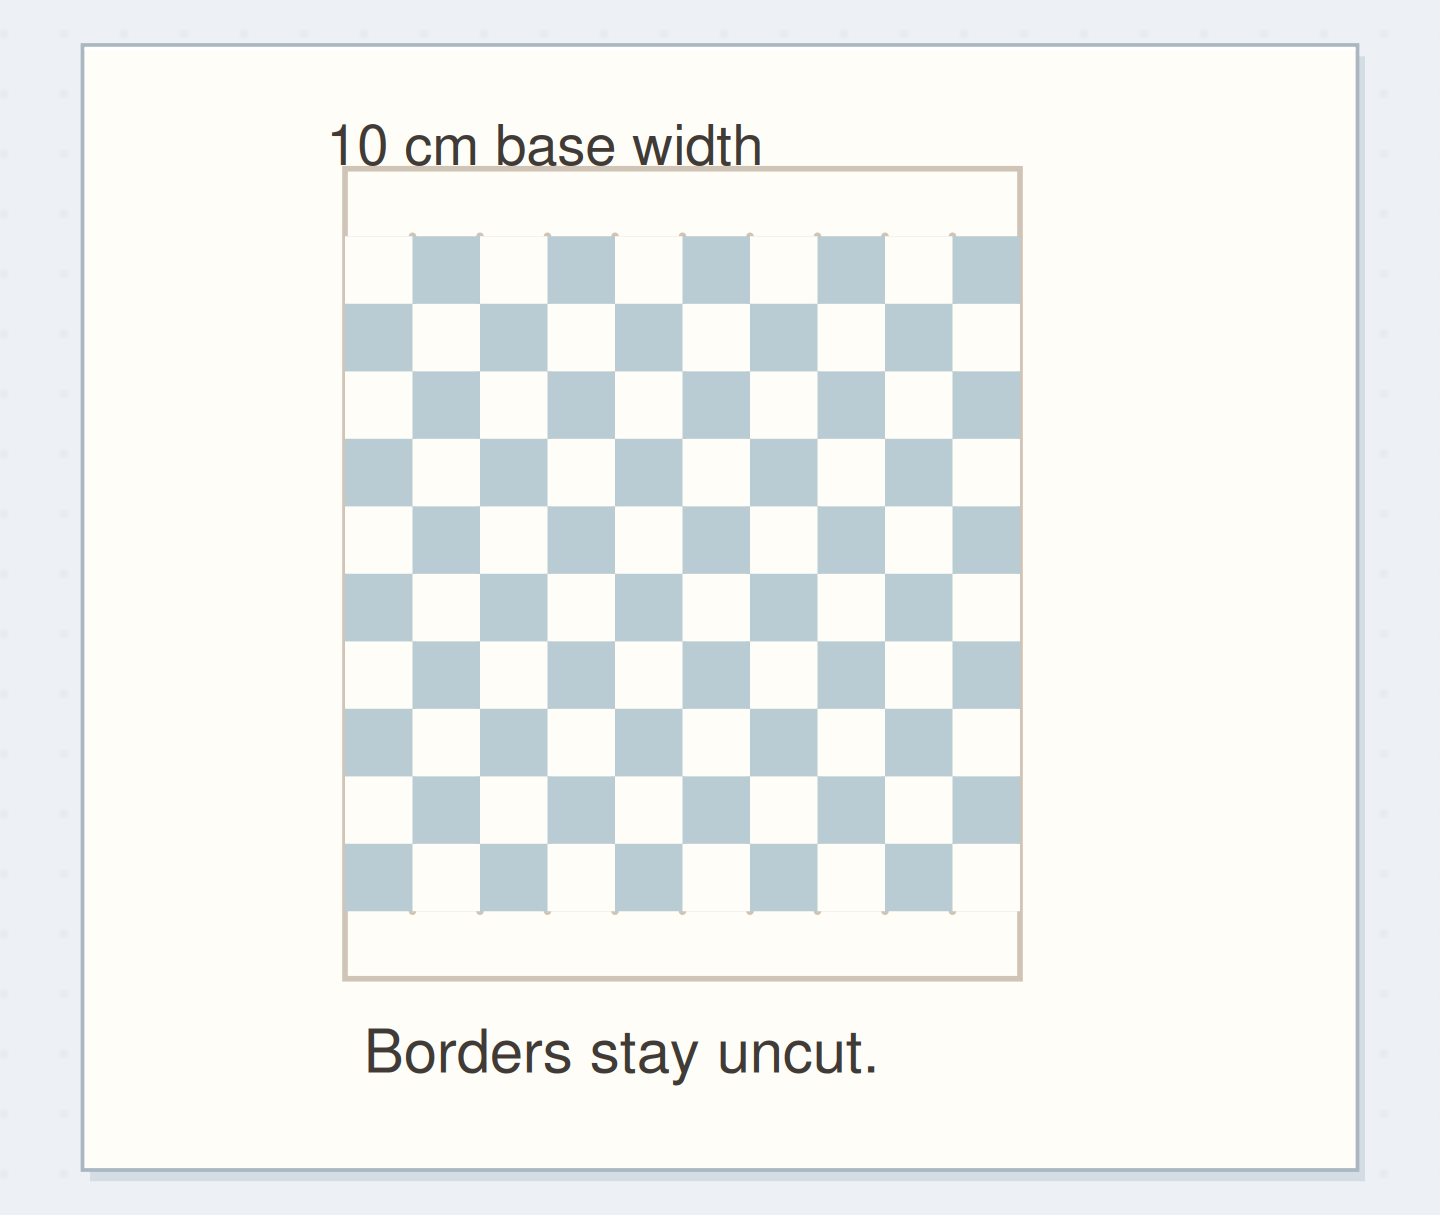
Follow the intact borders and the reversal between neighboring woven rows.
Both 1 cm end borders remain intact.
Slits stop 1 cm before the two borders. Use the article measurements for the physical version; the drawing is a schematic.
“The crossings should hold their pattern without needing a thick coat of glue.”
Reverse the route on every new row
Feed the first loose strip across the slits, passing over one band and under the next. Ease it toward the lower stop line without forcing the crossings tight. Feed the second strip across in the opposite pattern: where the first is over, the second must be under.
Continue upward, checking each new row before adding another. Hold the base flat on the table and lift only the bands you need. If the strips begin bowing, ease them apart slightly. A neat weave comes from even spacing and the correct route, not from pulling every strip as hard as possible.
Order the steps: cut slits with end borders first
Check the physical dependencies in this paper weaving example. Reorder the actions before trying the paper version.
One workable order
- Cut slits with end bordersIntact end borders hold the cut bands together.
- Weave and check rowsAlternating rows establish the weave before adhesive prevents changes.
- Secure loose endsSecuring checked ends keeps the finished rows from slipping.
- Trim dry excessDry excess can be trimmed without moving wet glued ends.
Which check needs to come first?
The example shows one workable order. Dry excess can be trimmed without moving wet glued ends.
A blue-and-cream panel beside a short list
Use cream copy paper for the connected base and strips cut from a blue leaflet margin for the loose rows. Alternate the route until the slitted area is filled. Leave the top and bottom cream borders visible; they make the construction look deliberate and keep the strips connected.
Place the panel beside a list headed “Things we noticed on the walk.” Write the list on the journal page rather than across the weave. A small woven rectangle can suggest the rhythm of fences, windows, or paths without pretending to be a literal picture of any of them.
Plan words beside the weave
Choose two actual papers and draft the words that will sit beside the weave.
Words beside the weave:Things we noticed on the walk.
Paper pair to try:Cream copy paper and a blue leaflet margin.
Your words have a place now.
Choose two actual papers and draft the words that will sit beside the weave.
- Words on this card
- 22
Correct one crossing before trimming
If two neighboring rows show the same over-under pattern, slide the newer strip back out and reinsert it. There is no need to unweave everything below it. If a band tears at a stop line, support the reverse with a small thin-paper patch and shorten the woven area by one row.
A strip that is too wide will bunch, even when its route is correct. Trim that strip narrower on the table. Don't enlarge all the slits to accommodate one awkward piece. If every row is difficult to insert, start again with thinner paper or a slightly wider spacing between the slits.
Check the second row
Inspect each crossing in row two and confirm it reverses the crossing immediately above it.
First row
One row alone does not establish the alternating structure.
Fix the edges after the pattern works
Once the panel lies flat, attach the loose strip ends to the reverse of the side edges with a small amount of glue. Let them dry, then trim the excess flush with the base. Keep adhesive away from the visible crossings so the surface doesn't become stiff and shiny.
If you need extra support, mount the weave on one thin backing slightly larger than the slitted area. Try it loose in the notebook first. Leave space beside the binding so the panel doesn't bridge the gutter or resist the page turn. Avoid stacking several woven panels in the same place through the book.
Keep the first weave small enough to use
The crossings should hold their pattern without needing a thick coat of glue. Run a fingertip lightly across the dry panel, check for loose ends, and attach it where you planned. Open and close the notebook once to make sure the new rectangle follows the page.
Stop when the edges are secure and the writing still has comfortable room. For another session, vary one thing: the paper pair, strip width, or proportion of the panel. Washi weaving uses the same alternating logic but adds adhesive handling, so it is a useful separate experiment once this paper version feels familiar.
Where this idea began
Want to follow the idea further? These community discussions and maker references are a good place to start.
- An art journal page featuring paper weaving
A maker shares paper weaving as an art journal experiment.
- MassArt Art Museum: Weaving with Paper
The museum explains alternating over-one, under-one weaving and reversing the next row.