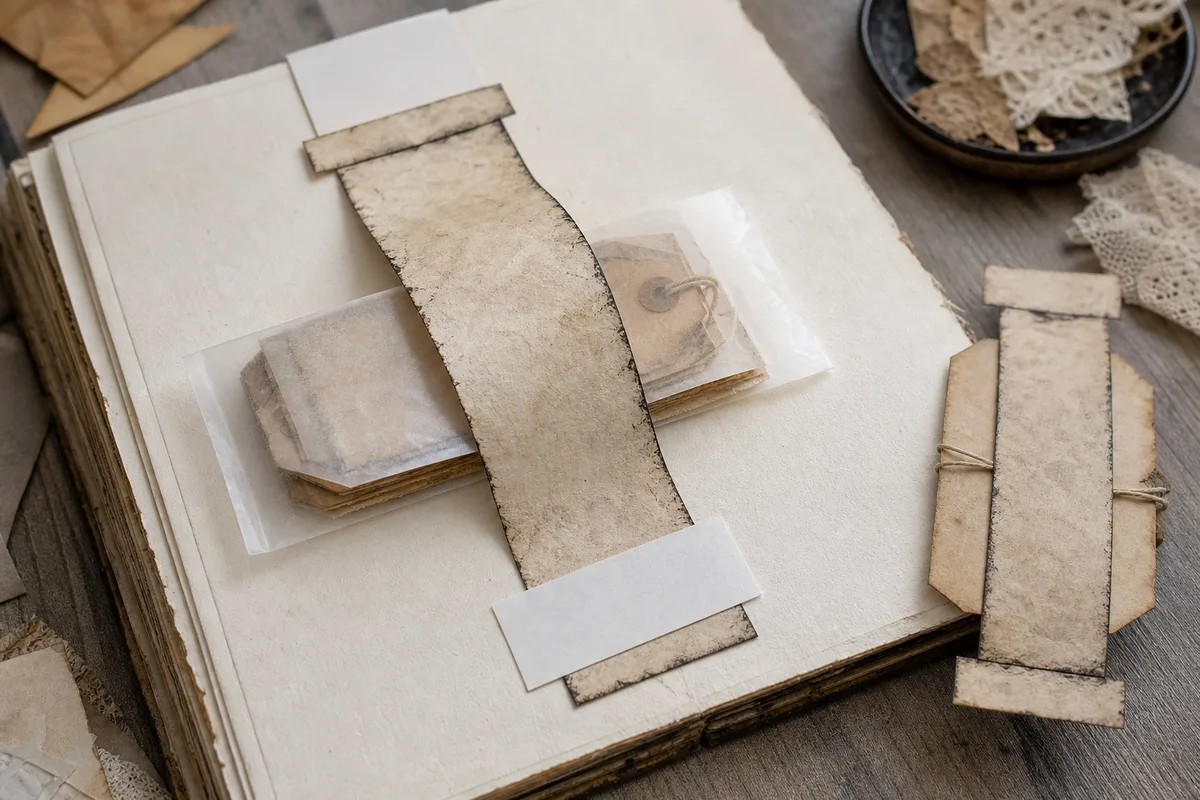
Gather a few things See what you’ll need
- Light paper for a panel about 6.5 × 9 cm
- A thin tag about 5 × 7.5 cm
- A paper strip about 2–2.5 cm tall for the band
- A thin folded-paper hinge strip
- Narrow adhesive
- Scissors and a pen
Choose an exercise 4 things to try as you read
Start with one thin tag
For a tag about 5 × 7.5 cm, try a panel around 6.5 × 9 cm. Those are roughly the original 2 × 3 inch tag and 2.5 × 3.5 inch panel sizes. Hold both against your page before cutting the final pieces; the panel needs to cover the hidden note without crowding the book’s fold.
Use flexible paper or light cardstock, not chipboard. The hinge will carry the panel, band, tag, and any decoration together. A plain test version makes it easier to feel whether the weight is already too much. Keep the hidden note short enough that it won’t need to run into the hinge.
ONE WORKED EXAMPLE
A packing list over a last-minute kindness
You want a removable tag for a short overnight packing list and a hidden sentence about borrowing a bag. These notes have different uses, so they need distinct movements.
Before
The list is written beneath the hinged panel and the personal sentence is on the tag, forcing you to lift everything whenever you check the practical list.
After
The visible tag holds “Charger, socks, notebook.” Beneath the top-hinged panel: “Ana lent me her old bag and left a biscuit in its pocket.” The exposed tag edge slides under the dry band; a separate cue at the panel’s bottom invites the hidden note.
What changed—and what to check
The frequently consulted list uses the removable part. The hidden sentence supplies the memory, and separate cues tell your fingers which movement to begin.
Try this check. Find the packing list without lifting the panel, then open the panel using its own lower-edge cue.
Something for a future page?
The Washi Tape ShopAffiliate links: we may earn a commission if you buy through these links.
Build the sliding part while it’s loose
Cut a band about 2–2.5 cm tall and long enough to cross the panel with spare length at both ends. Lay the tag vertically on the panel, then put the band horizontally across its middle. Use the real tag to leave a little room beneath the strip.
Wrap the two band ends around the panel’s left and right edges. Attach those ends to the back of the panel, keeping adhesive off the tag and the front channel. Remove the tag while the adhesive sets. The tag should later slide upward or downward beneath the band; the band’s open top and bottom make that possible.
Test the dry holder on the desk before adding its hinge. Pull the tag with one hand while the panel rests lightly in the other. If the panel bows or needs bracing, use a narrower or thinner tag, or remake the band with a little more room. The hinge should not have to absorb a struggle already present in the sliding part.
Try a what-ifThe tag is nearby while the glue sets
The tag is nearby while the glue sets
Consider this page before choosing your next move.
You have wrapped and bonded the band ends to the panel’s back. The actual tag fits nicely, but the adhesive is still damp.
Compare the three choices
What should happen before the holder is loaded?
- Keep the tag inside to preserve the channel shape.
The useful fit check is already done. Leaving the real tag beside a damp bond risks attaching it to the holder.
- Remove the tag, let the adhesive set, then retest the slide.
Drying empty keeps the real insert clear of adhesive. The dry fit check shows whether the channel remained usable.
- Add the journal hinge and test both movements immediately.
That adds another fresh bond before you know the sliding part works after drying.
Fit with the real insert, but keep it clear while adhesive sets.
What would you try?
Choose an option to see what it would do. You can explore all three.
Attach the panel at its top edge only
Fold a narrow strip of thin paper lengthwise to make the hinge. Attach one half along the panel’s top back edge and the other half to the journal page above the panel’s intended position. Keep the crease free of adhesive, and leave the panel’s bottom and both side edges unattached.
Lift from the panel’s bottom edge. The panel, band, and tag should rise together, revealing the page underneath. Place the whole piece toward the outer half of the page if the gutter interferes. Let the adhesive set, then close and reopen the journal before adding writing or decoration.
Try the exampleLift the holder as one piece
Lift the holder as one piece
Change the hinge angle. The tag holder lifts over a separate sentence on the journal page.
Read the words in this example
- Fold projection
- Your words
- Wine = fixed hinge
- Side profile
- 60° from closed
Top hinge stays fixed; the flap lifts 60° from closed.
Lifting the flap can reveal sentence on page beneath its closed footprint. Gold is the moving flap and wine is its attached edge. The side profile shows the lift angle; the upper view is an oblique geometric projection. These are rigid-paper schematics, not predictions of bending, clearance, or collisions. Try the motion: loaded panel. This projection models the panel-to-page hinge only. The band and tag remain on the panel and rise together; their independent sliding channel is not a pocket between the panel and journal.
- Lift angle
- 60°
- Fixed hinge
- Top edge
- Model
- Oblique projection + side profile
Let the tag name it and the note say more
The visible tag can hold the date, place, or a small list. Under the panel, keep the sentence that adds something different. ‘Saturday walk’ on the tag might lead to ‘We took the long way because neither of us wanted to go home yet’ underneath. Use your own real detail, even if it’s less tidy.
Leave reading room below the hinge and let the ink dry. Give the panel’s lower edge a small lift cue, separate from the tag’s exposed pull edge. Try touching the cue before moving anything: it should be clear whether you are about to slide the tag or lift the whole holder.
Write your versionTwo messages, two different jobs
Two messages, two different jobs
Edit a short tag label and the detail revealed beneath the panel.
TagSaturday walk
Under the panelWe took the long route to finish our conversation.
Your words have a place now.
Keep the tag’s pull edge distinct from the panel’s lifting edge. These example words are yours to replace.
- Words on this card
- 15
GO A LITTLE FURTHERChange one part once the first version works
Change one part once the first version works
A top hinge lets the panel lift upward and settle back naturally. For a side hinge, move the hinge strip to a vertical edge and let the panel open sideways. Keep the band attached to the panel as before, and check that the new swing doesn’t fight the gutter.
A miniature version can cover one date or a single sentence in a small journal. Two thin tags are possible, but keep them clear of the hinge and test the actual thickness; return to one if the band bows or the closed page develops a ridge. If you only want the hidden sentence, a plain flap is simpler. If you only need the tag holder, use a regular belly band.
Keep the two movements easy
If the panel won’t lift, check for adhesive along a side or bottom edge. If the tag falls out, remake the band slightly snugger or add a small, flat stop beneath the tag’s resting position, leaving upward removal clear. If the top hinge peels, remake it with suitable flexible paper and enough bonded area rather than piling decoration over it.
With the tag inside, slide it once, lift the whole panel, read the hidden sentence, and close the journal. Check the top bond again after that complete cycle. Add only a flat color repeat if you want one; the holder is finished when its two actions remain easy with the actual contents in place.
Compare the optionsWhich movement is asking for help?
Which movement is asking for help?
Choose what happens in your plain trial. Repair the part responsible for that movement.
Read the words in this example
- panel
- tag
- band
Loosen the sliding fit.
The band channel is too demanding if you have to brace the panel to pull the tag. Try a thinner or narrower tag, or rebuild the wrapped band with a little more room. Extra hinge tape will not remove that resistance beneath the band.
Where this idea began
These sources support the band-and-flip construction, Linda Israel example, and hinge movement used above.
Want to explore the techniques a little further? Here are the maker tutorials and references behind this guide.
- Construction referencePoppiwinkle: The Ultimate Belly Band
A belly-band construction example supports leaving a passage beneath a strip.
- Construction referenceLinda Israel: Bellyband with Flip and Pockets Tutorial
Linda Israel’s belly band with a flip and pockets supplies the named combined structure.
- Construction referenceMad Paper Crush: How to Add Tip-Ins to Your Journal
Journal tip-in methods inform one-edge attachment and leaving a paper flap free to move.
- Construction referencePoppiwinkle: Hidden Journaling Spots
Hidden journaling formats provide related lifting, folding, and concealed-writing examples.
- Paper mechanism contextRobert C. Williams Museum of Papermaking: Movable Mechanisms
A museum overview explains movable-paper mechanisms; practice dimensions and clearances are editorial.
- Paper mechanism contextSmithsonian Libraries: Paper Engineering, Fold, Pull, Pop and Turn
A museum paper-engineering overview supplies fold, pull, and turning vocabulary; guide dimensions are adaptations.