Gather a few things See what you’ll need
- A lightweight photo copy, ticket, or card
- Smooth scrapbook paper or light cardstock
- Scissors and ruler
- Glue or narrow double-sided tape
- A matching test card
- Optional: silicone release paper
Choose an exercise 4 things to try as you read
Cut a triangle from a smooth paper square
For a test card around 2¼ × 3¼ inches, start with a 2½-inch square and cut it diagonally into two equal triangles. This gives you a generous trial size. Hold one over the card and trim it smaller if it covers more of the picture than you want.
A 2-inch square is useful for small tickets. For a larger photograph, try a 3- or 3¼-inch square and consider using a second corner for support. Smooth scrapbook paper or light cardstock works well. Avoid rough glitter, gritty fibers, and thick dried paint on the inside where the photo will rub.
ONE WORKED EXAMPLE
A triangle hides the wrong part of the photograph
You are trying a lower-right tuck for a 2¼ × 3¼-inch photo copy. A triangle cut from a 2½-inch square covers the small dog you wanted the page to remember.
Before
The trial size provides support, but its generous face hides an important detail even though the card can still slide underneath.
After
You trim the loose triangle so the dog remains visible while at least ½ inch of card stays accessible beyond the diagonal. The two straight sides receive narrow adhesive, stopping about ⅛ inch short of their diagonal ends; the holder dries empty.
What changed—and what to check
The image chooses how much covering is useful. Keeping access beyond the open diagonal preserves the removal route while the straight edges provide the attachment.
Try this check. Slide the copy out toward the open diagonal and check that the remembered detail stays visible when it is inserted.
A little tape for your next page?
The Washi Tape ShopAffiliate links: we may earn a commission if you buy through these links.
Let the diagonal face the open part of the page
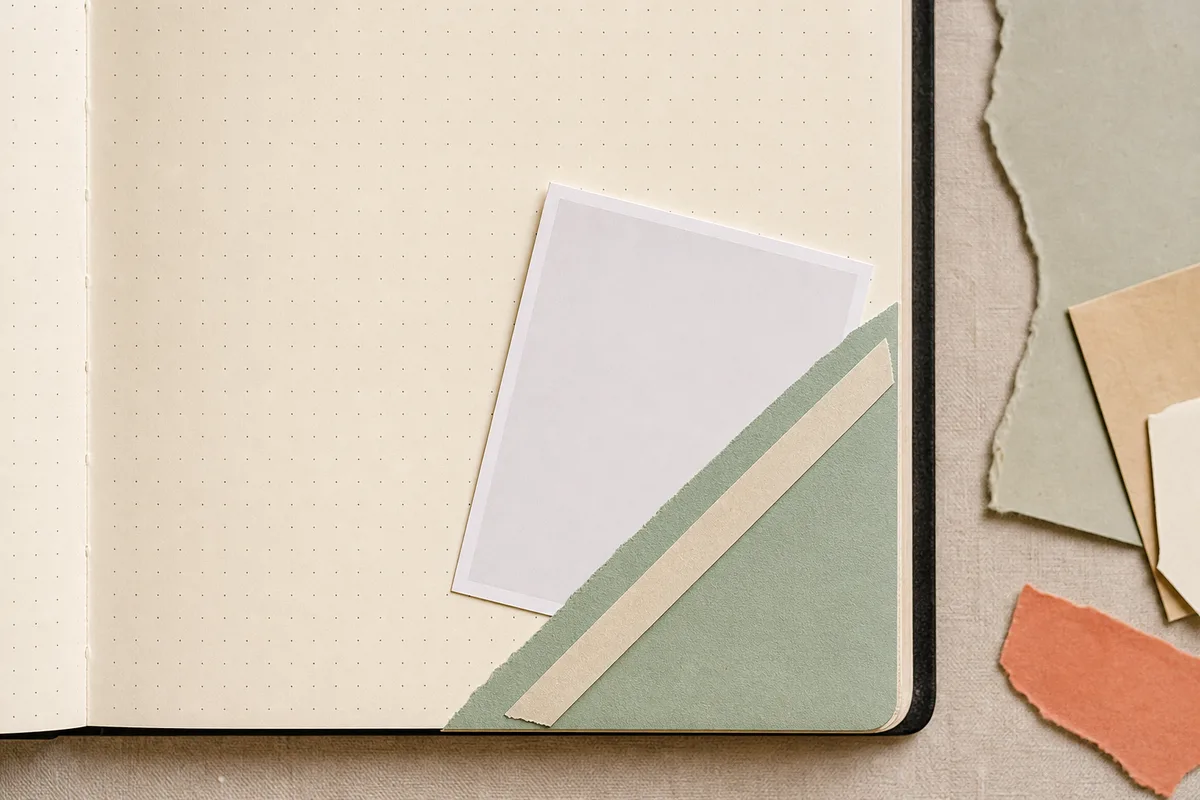
For a lower-right tuck on a right-hand page, place the straight sides along the bottom and right. The diagonal faces upper left: slide the card down and right to insert it, then back toward the upper left to remove it. Trace that route with the loose pieces before gluing.
For a lower-left tuck, mirror the arrangement: bottom and left attach, diagonal opens upper right. Keep the holder inside the page edges and away from the curved binding so your fingers can follow the route without bending the journal page.
Try the exampleThe sloping edge is the opening
The sloping edge is the opening
Toggle the lower-left triangle’s straight bonds. The diagonal stays clear for the photo corner.
Read the words in this example
- Front attachment
- Insert
- Open
- Attached
- Free edge
Corner tuck: 2 attached edges.
The left and bottom edges are attached; the diagonal remains an opening for photo copy. This is a general attachment diagram, so test the actual paper and adhesive. This is the lower-left version: the diagonal faces upper right. Mirror the triangle for a lower-right position, where bottom and right attach and the card enters down and right. It is a corner hold, not full enclosure.
- Attachment
- Corner tuck
- Attached edges
- Left, Bottom
- Open edges
- Diagonal
“Keep glue, tape, stitches, and decoration off the diagonal opening.”
Keep the interesting part of the photo outside the tuck
Place the card behind the loose triangle and look at the picture. Aim to cover only the corner area you need for support, often roughly a quarter to a third of a small card’s face. The image itself is the better guide: a triangle shouldn’t cover the person or detail you’re trying to keep.
Leave at least ½ inch of accessible card beyond the diagonal. If the trial triangle covers too much, reduce it before gluing. For a special original photograph, practice with a copy and choose a holder or sleeve suited to how you want to preserve and handle it.
Compare the optionsLet the picture choose the triangle size
Let the picture choose the triangle size
Choose the issue you see when the loose triangle rests over the photo.
Read the words in this example
- photo
Trim the loose triangle smaller.
A generous starting triangle is useful for testing, but it need not stay that size. Keep the person, place name, or meaningful detail visible and leave at least ½ inch of accessible card beyond the diagonal. Support is useful only if you can still enjoy and retrieve the picture.
Glue the two straight sides and leave the slope clear
Turn the triangle over and mark its two straight edges as the attachment sides. Add a thin line of glue or narrow tape just inside those edges. Stop about ⅛ inch before each point where a straight side meets the diagonal.
Attach the triangle to the page and press only along the two glued sides. If you use release paper beneath the diagonal, draw it gently through while the glue is still workable to catch any squeeze-out. Remove the guard before it becomes trapped and let the corner dry empty. Keep glue, tape, stitches, and decoration off the diagonal opening.
Try a what-ifThe inside surface feels gritty
The inside surface feels gritty
Choose a trial that protects the photograph you want to keep.
The only triangle you have decorated has rough glitter on the face that would rub against an irreplaceable original photograph. Its size and opening otherwise fit.
Compare the three choices
What should you change before using the original?
- Push the original in once to see whether the glitter scrapes.
A successful fit would not undo any abrasion from the test. Use replaceable material when checking a rough holder.
- Press the triangle firmly around the original to flatten the surface.
Pressure does not remove the gritty contact and may increase rubbing against the photograph.
- Use smooth material and a copy for the trial, then choose a suitable holder for the original.
Geometric fit is only part of the decision. The contact surface and how you want to handle the original matter too.
Check the contact surface as well as the fit, using a replaceable copy for trials.
What would you try?
Choose an option to see what it would do. You can explore all three.
Try one corner before adding the second
Try the card with ordinary fingertip pressure and check that it stays flat. Then hold the page upright. If the card needs more support, consider a larger triangle, a lighter insert, or another holder before deciding that more glue will solve it.
For a larger card, position a second tuck diagonally opposite with the actual card in place. Leave enough room to lift and slide it out; the two corners should support, not squeeze, the card. Four corners can suit a fixed display but make frequent removal less convenient.
Compare the optionsDoes this photograph need another corner?
Does this photograph need another corner?
Choose what happens after the first corner is dry and the page is held upright.
Read the words in this example
- photo
Keep one corner.
If the card stays supported during normal handling and removes easily, the first corner has done its job. Adding the other spare triangle would cover more of the image and create another fit to manage. Save it for a different page and keep this picture easy to read.
GO A LITTLE FURTHERTest the decorated opening, not just the plain one
Test the decorated opening, not just the plain one
Keep raised decoration toward the attached sides and away from the diagonal. Add a flat label or stamp if wanted, then remove the card again: a lace loop can obstruct an opening that worked before decoration.
If one rough point catches a replaceable test card, smooth or slightly round that card’s corner. Remake a triangle whose diagonal has glued shut rather than forcing a photo through. Reposition the tighter corner if a pair bows the card, then close and reopen the loaded journal once more.
A little tape for your next page?
The Washi Tape ShopAffiliate links: we may earn a commission if you buy through these links.
Where this idea began
These references informed the diagonal-entry logic, two-edge attachment, and the scored-tab variation.
Want to explore the techniques a little further? Here are the maker tutorials and references behind this guide.
- Construction referenceGez Carpenter, Nigezza Creates: Vintage Days Journal — Belly Band & Corner Pocket
Gez Carpenter’s belly-band and corner-pocket example supplies a related two-edge retaining form.
- Construction referenceAstrid's Artistic Efforts: Junk Journal Corner Pocket Tutorial
A maker’s corner-pocket construction and scored-tab variation.
- Construction referencePapercraft Panda: 3 Fantastic Ways to Mount Photos in an Album
Photo mounting alternatives, including corners; ordinary craft attachment is distinct from conservation treatment.
- Construction referenceChica and Jo: How to Make Photo Corners
A handmade photo-corner method supplies a related two-edge retaining form.