Gather a few things See what you’ll need
- Brush pen
- Smooth compatible scrap paper
- Pencil
- Ruler
Learn what the tip does at rest
Make one short mark using only enough contact for the pen to write. Beside it, make a downward stroke with slightly more pressure so more of the flexible tip meets the paper. Avoid driving the point straight into the sheet. Compare the widths after the marks dry. Lettering Daily's basic-strokes guide separates light upstrokes from heavier downstrokes; the useful starting point here is finding a clear difference with your actual pen. If both marks are broad, shorten the exercise and experiment with a lighter touch before adding speed.
Separate three brush movements
Compare rises, descents, and the release into a turn.
Light rising strokes are practiced separately
Move upward with light contact, lifting between the separate rising strokes.
Draw three small practice bands
Pencil three pairs of horizontal lines, each pair 15 mm apart, with enough space between bands to keep the marks separate. The top band will hold light rises, the middle band heavier descents, and the bottom band transitions. Make five marks per band rather than filling an entire page. Keep the pen angle approximately consistent across each row so pressure is the main changing variable. A new pen angle can change how much of the tip touches the paper, making two otherwise similar movements difficult to compare.
“Stop after the three rows and the optional u samples.”
Give upstrokes and downstrokes their own row
In the first band, begin near the lower guide and move diagonally upward with light contact. Lift before starting the next rise. In the second band, begin at the upper guide and draw downward with enough pressure to produce your broader mark, easing off before lifting. Don't insist on a maximum-width stroke. Choose a width you can repeat without the tip folding awkwardly. Compare the middle of each stroke rather than its starting blob or final taper. The row is a tool sample, so an occasional irregular mark can remain informative.
Look at the rising exit
Move the reveal control to inspect this specific change.
Heavy return
The returning stroke remains broad.
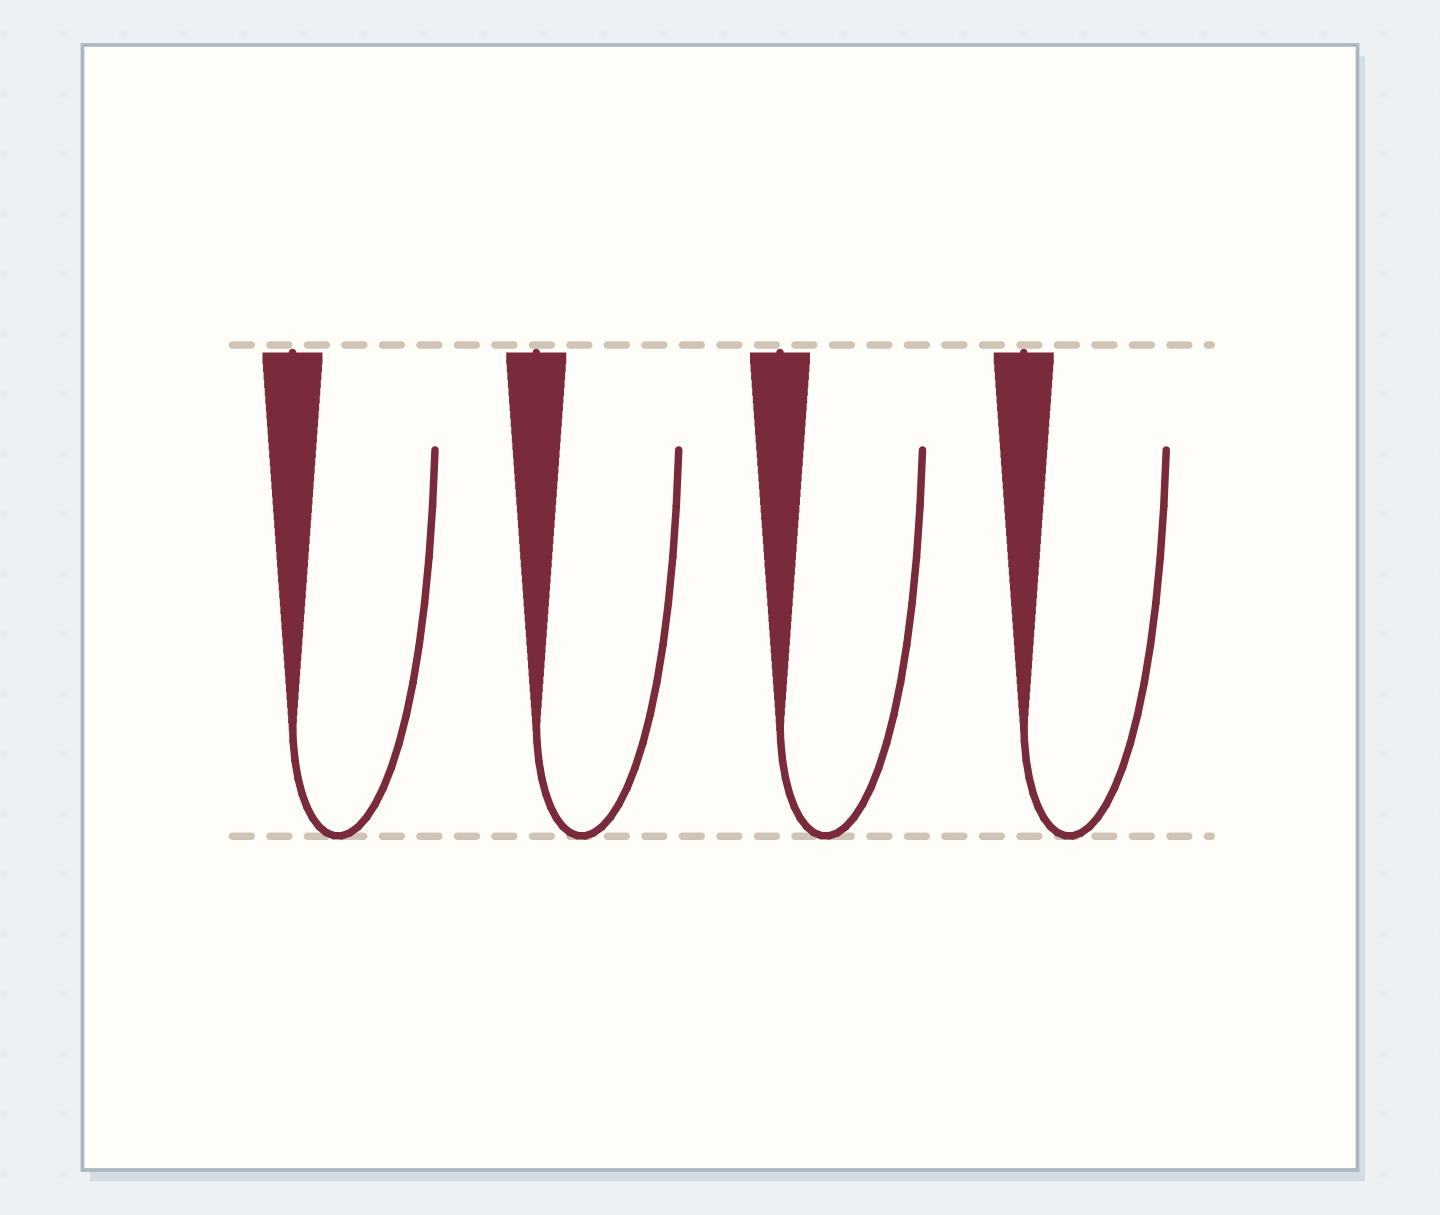
Join one descent to one rise
In the final band, draw a broad descent, gradually release pressure near the bottom, then curve into a light rising line. Keep the turn slow enough to see the transition rather than flicking through it. Make five versions, each with a visible light exit. This underturn is a building block for several lowercase forms, but you needn't assemble a word yet. Select the sample whose narrow exit begins cleanly before it rises. The aim is control of the change, not producing the fattest possible downstroke.
Diagnose a heavy rising line
If every exit remains thick, stop after the descent on your next attempt, release pressure, and then begin the rise as a separate stroke. The tiny break makes the change easier to observe. Once those two widths are clear, try joining them again. If a mark looks scratchy, test another area of the same paper and inspect whether the tip is catching; don't solve every dry-looking mark by pressing harder. Community brush-lettering questions show that pen flexibility and paper can complicate early practice, so compare tools only after identifying the variable you're changing.
Write your stroke target
Record the visible result; do not assign a universal force value.
Pen and paper:My brush pen on smooth scrap
Visible practice target:A thin exit before the line rises
Your words have a place now.
Record the visible result; do not assign a universal force value.
- Words on this card
- 19
Apply one successful turn to a short form
Use the selected underturn as the main movement of a lowercase u, adding its other strokes separately as needed. Keep the letter body roughly the same height as the ladder. Place three u forms beside the practice row and compare their rising joins. If assembling the letter makes everything thicker, return to two separate transitions before trying again. You can also stay with strokes for this session. A small reliable component is useful even when it hasn't become a polished word, and repeated letters needn't be completed without pen lifts.
Before assembling a brush letter
Order the preparation before the operation that needs its result.
One workable order
- Test light and broader marksA test reveals which broader mark the actual pen can repeat.
- Choose a repeatable downstroke widthThe chosen downstroke width is the starting condition for the release.
- Practice release into an underturnA letter uses the underturn that has already been practiced.
- Use that turn in a letterStop after the three rows and the optional u samples.
Which check needs to come first?
The example shows one workable order. Record the visible result; do not assign a universal force value.
End with a tool-specific reference
Stop after the three rows and the optional u samples. Circle one light rise, one broader descent, and one transition that you can distinguish clearly. Write the pen and paper names if you know them, or a description that identifies the combination later. Don't assign a universal pressure number: the page records the visible result, not a measured force. On another day, repeat the same short ladder before changing letter size. That makes it easier to see whether your next adjustment improves the actual stroke you intended to practice.
Where this idea began
Want to follow the idea further? These community discussions and maker references are a good place to start.
- new with some questions on best practices, paper, practicing
The search excerpt asks about brush-pen flexibility, practice size, paper, and spacing.
- The Basic Calligraphy Strokes Guide
Separates light rising strokes, heavier descents, and basic connecting stroke forms.