Gather a few things See what you’ll need
- Two simple stamps
- A compatible ink pad
- Thin low-tack masking paper
- Scissors
- A smooth practice card
- A pencil
Decide which image owns the overlap
Choose two stamps with uncomplicated outlines. A rectangular label and a simple leaf are easier to mask than an intricate spray of fine stems. Make a loose pencil plan showing where the shapes will sit and which one should appear closer to the reader.
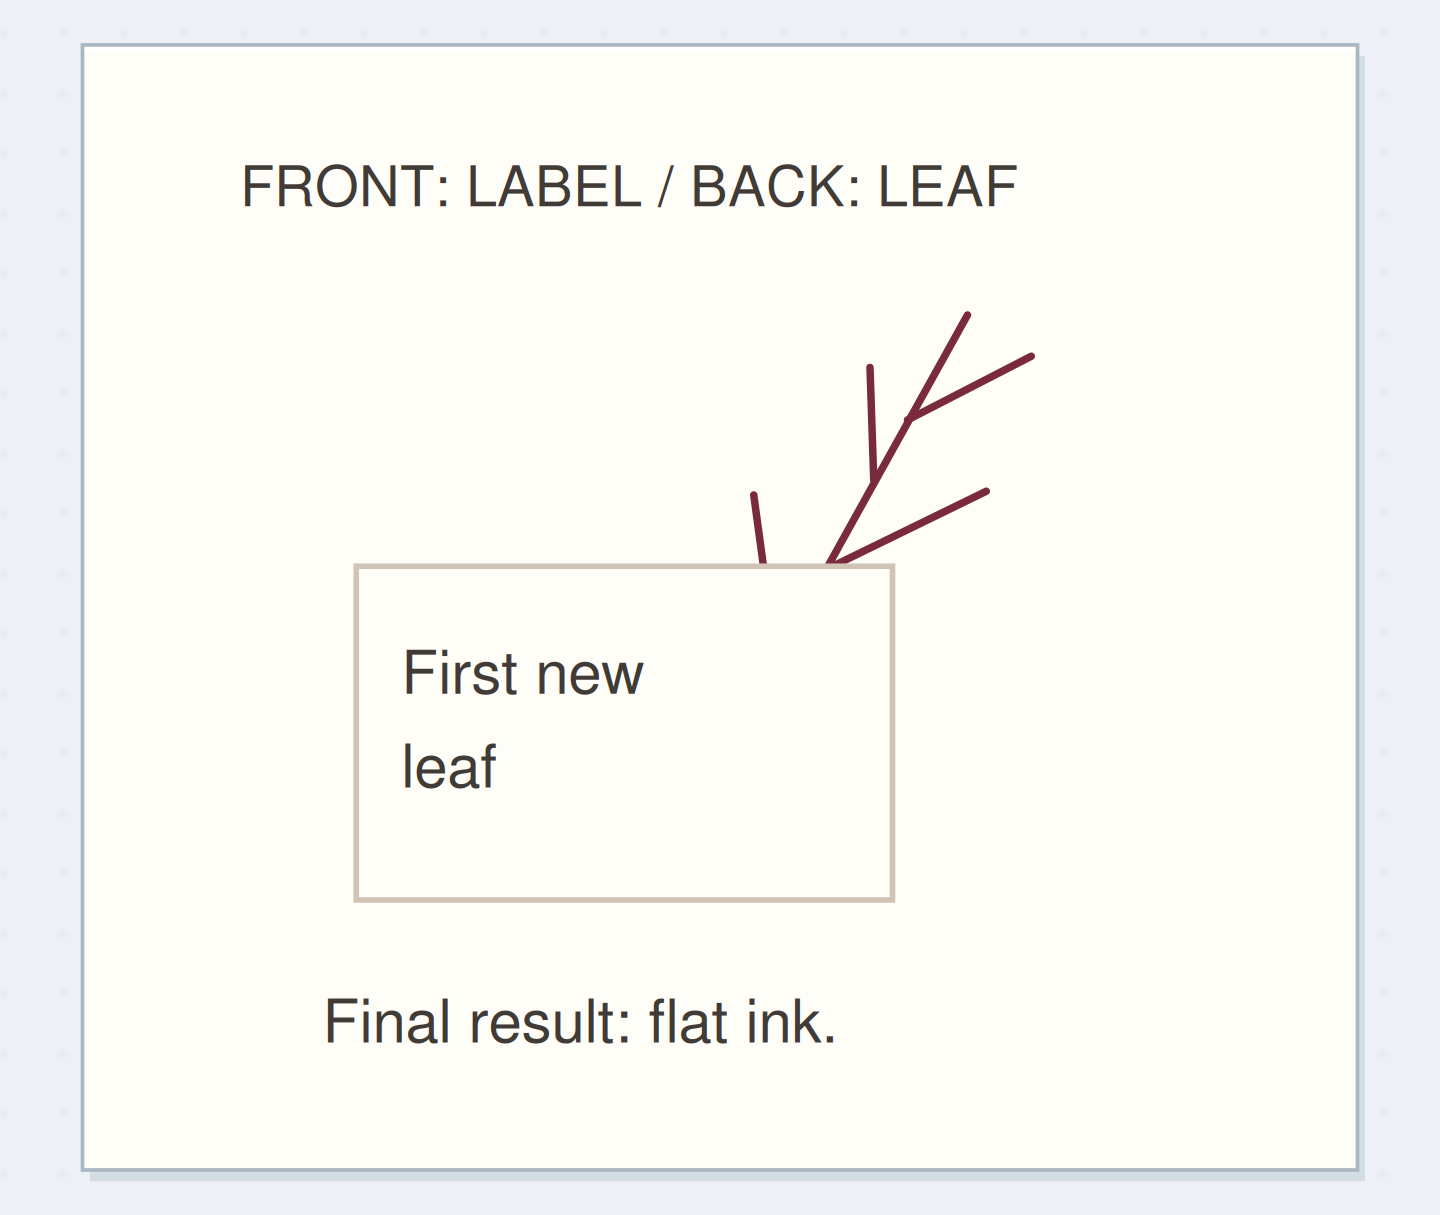
For the example, a small label rectangle sits in front of a leaf. The leaf will appear to emerge from behind the label's upper-right edge. This front-to-back decision must happen before the first permanent impression; the stamping order follows the visual order you want to create.
Make a matching temporary cover
Stamp the foreground image onto thin masking paper and cut around its outline. Keep the mask close to the stamped edge so a broad unprinted halo won't appear around the image. Test the adhesive on a spare piece of your final paper before putting it over finished ink.
If you use a sticky note, make sure enough of the cut shape includes the adhesive area to stay in place. A very thick mask can hold the stamp above the surrounding paper and leave a gap near the edge. Thin paper generally makes the overlap easier to print cleanly.
Stamp the Front Image First, Then Put Another Behind It
Follow the foreground mask that stops the second stamp from crossing through the label.
The label is the foreground object.
The rectangle belongs in front of the leaf. Use the article measurements for the physical version; the drawing is a schematic.
“The illusion of depth should remain after the masks are gone.”
Print, dry, cover, and print behind
Stamp the foreground rectangle on the practice card and allow the ink to dry. Position the matching mask directly over it. Press the mask lightly so it stays flat, especially along the edge where the next impression will cross.
Ink the leaf stamp and print it partly across the masked rectangle. The overlapping portion lands on the temporary mask, while the exposed part prints onto the card. Lift the stamp straight up, then remove the mask carefully. The rectangle should remain intact, with the leaf appearing to continue behind it.
Order the steps: stamp the foreground first
Check the physical dependencies in this stamp masking example. Reorder the actions before trying the paper version.
One workable order
- Stamp the foregroundThe first image is the one that must appear in front.
- Dry and cover itDry ink and a matching mask protect that foreground surface.
- Stamp the backgroundThe background stamp deposits its unwanted overlap onto the mask.
- Lift the temporary maskRemoving the temporary mask reveals the clean overlap.
Which check needs to come first?
The example shows one workable order. Removing the temporary mask reveals the clean overlap.
A leaf behind a short garden note
Place the rectangle slightly below the center of a small card. After masking it, stamp the leaf so its stem disappears behind the upper-right corner. Remove the mask and write “First new leaf” inside the rectangle once all ink is dry.
Attach the card beside your own observation of a plant or a walk. The example doesn't require a realistic botanical scene. The useful result is a clear overlap with no extra paper thickness. A simple foreground label also keeps the words easy to find when the journal page contains other scraps.
Plan the foreground image
Name the foreground image before writing the words that belong inside it.
The foreground image:A plain rectangular label.
The caption inside it:First new leaf.
Your words have a place now.
Name the foreground image before writing the words that belong inside it.
- Words on this card
- 14
Find out why a gap or extra line appeared
A wide pale halo can mean the mask was cut too large or was too thick for the stamp to reach the paper beside it. Try a thinner mask cut closer to the outline on a new practice card. A tiny halo may be perfectly acceptable if the relationship still reads clearly.
An unwanted line through the foreground usually means the mask shifted or left part of the image exposed. Reposition the mask before making another test rather than adding heavier outlines to the first card. If adhesive lifts paper fibers, switch masking material or keep the images separate; the technique shouldn't require damaging the page.
See the clean front-to-back relationship
Check the finished overlap for an unwanted line through the label or a broad pale halo at the mask edge.
Cover it
The temporary mask still hides the final foreground surface.
Add another layer only after the pair works
To place a third image behind the first two, mask both existing foreground images before stamping the background one. Keep the masks together for reuse if they remain clean and flat. Check the intended order on a scrap first, because every new image adds another possible overlap to manage.
You can also mask the paper to protect a caption area while stamping around it. That is related to stencil work, but it answers a different question from covering part of the stamp before inking. In this guide, the temporary paper sits on the artwork and receives the unwanted portion of the impression.
Finish with every temporary piece removed
The illusion of depth should remain after the masks are gone. Check the final card for an overlooked mask edge, let the ink dry fully, and read the caption at normal distance. The front shape should stay clear without needing a heavy border drawn over it.
Stop after the two-image example works. Keep the mask with its stamp if you expect to repeat the arrangement, or label it in a small envelope. Next time, change the overlap position or reverse which image is in front; you will get a different composition without needing another stamp.
Where this idea began
Want to follow the idea further? These community discussions and maker references are a good place to start.
- Printing only part of a stamped image
Replies distinguish masking the paper from covering unwanted parts of a stamp before inking.
- Jennifer McGuire: Masking Techniques
The creator explains stamping the foreground image first, masking it, and working toward the back.