Gather a few things See what you’ll need
- One pen and known ink
- Paper to test
- Clean backing scrap
- Pencil for labels
Give the two effects different names
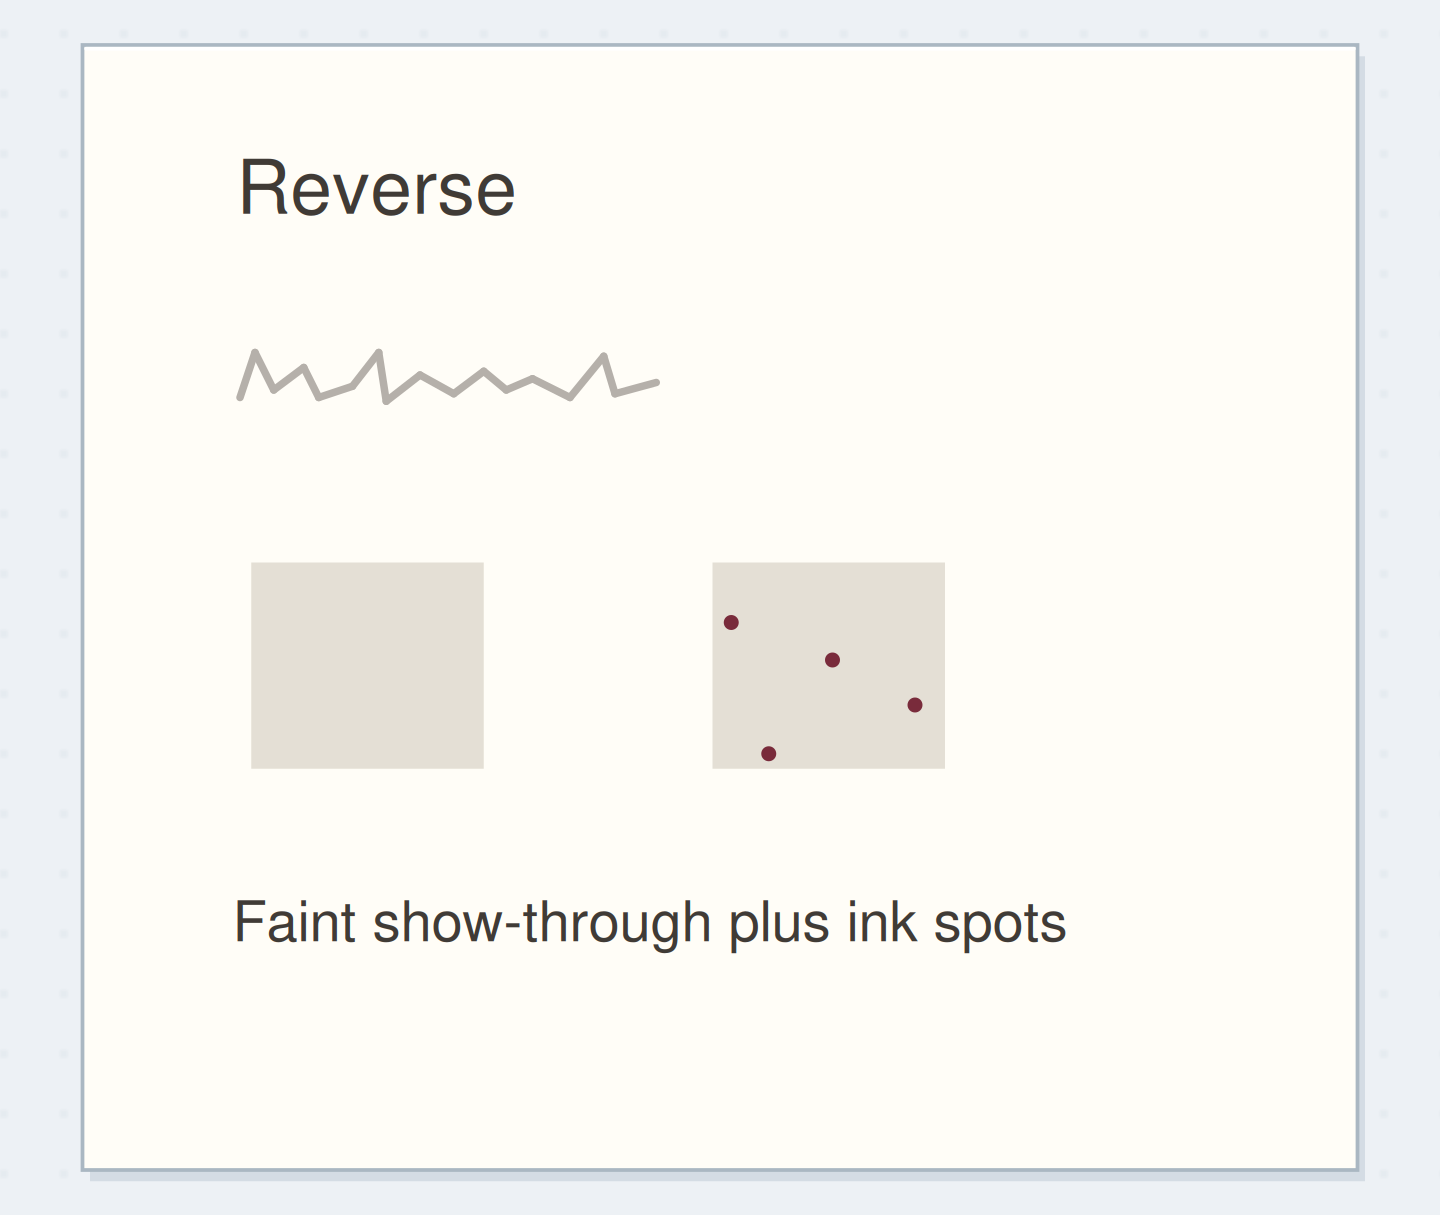
Ghosting, also called show-through, means you can see writing through the paper without the ink itself reaching the reverse surface. Bleed-through means ink has penetrated through the sheet. Goulet's glossary makes this distinction, and community questions show that judging photographs can be difficult. A pale reversed image suggests show-through, while distinct ink spots on the reverse can indicate bleeding. Both may appear together. If your observation is uncertain, write “unclear” rather than forcing a confident classification from a faint mark under one kind of light.
Inspect front, reverse, and backing
Keep the writing and heavy patch observations separate.
Separate normal writing from heavier patches
Make ordinary writing, a single-pass patch, and a separate heavier patch on the protected test sheet.
Protect the next page and keep one variable
Place a clean scrap beneath the test sheet. Use a spare area from the actual paper you plan to write on; a different loose sheet won't answer the same question. Note the pen, ink if known, and paper description. Make a small labeled area for normal writing and another for a heavier application. Keep the backing, light, and pen the same while comparing those marks. Paper weight alone doesn't establish ink resistance: Goulet's paper explanation discusses absorbency as well as thickness, so a gram-weight number cannot replace this direct sample.
“Stop after you have a dry normal sample, a heavier sample, and a note for each surface.”
Make normal and heavier marks separately
Write “A short note” once at your usual size and speed. Beside it, make a 10 mm square with a single pass of parallel pen strokes. In a separate square, add a second pass and label it “two passes.” Don't scribble repeatedly in the writing sample to make the test more dramatic. Leave the page open while the marks dry. There is no universal wait time for all ink, tools, and papers. Test dryness on a separate small mark before handling the main samples or pressing another sheet against them.
Replace one verdict with observations
Move the reveal control to inspect this specific change.
Unqualified verdict
A single verdict loses the difference between normal writing and heavy patches.
Read three surfaces in order
Look first at the front for fuzzy edges or spread. Then turn the dry test sheet over and examine the corresponding areas under ordinary room light. Finally, check the protective scrap for transferred ink. A mark on that scrap gives useful evidence that ink went through, but a clean backing does not prove the reverse is free of small bleed spots. For the example, suppose the phrase shows as a pale reverse image while the two-pass square has darker pinpoints. Record those two outcomes separately instead of assigning the whole page a single verdict.
Match the result to the page's job
If normal writing only ghosts and remains comfortable to read on both sides, you may choose to keep using that combination. If heavy fills bleed while the phrase behaves acceptably, reserve the pen for writing and use dry pencil for larger color areas. If ordinary writing bleeds enough to interfere with the reverse, try another pen already available or use that sheet on one side. These are practical responses to a test, not a ranking of whose tolerance is correct. A personal journal and a dense reference page may need different compromises.
Write your paper-test record
A clean backing is not proof that the reverse has no bleed spots.
Test combination:One pen on the journal test page
Normal writing result:Pale show-through; still readable
Heavy patch result:Two-pass square has reverse pinpoints
Your words have a place now.
A clean backing is not proof that the reverse has no bleed spots.
- Words on this card
- 24
Avoid turning inspection into more damage
Don't wet the reverse to see whether a mark moves, and don't scrape at a suspected ink spot. Those actions alter the evidence and can damage a thin sheet. If the page beneath has been marked, leave the protective scrap in place for further tests and use the affected area for notes about the result. If the lighting makes the distinction hard to see, compare again under consistent diffuse light with the sheet against the same backing. Mark ambiguous cases honestly; the application decision can still be clear even when the exact label isn't.
Before inspecting the reverse
Order the preparation before the operation that needs its result.
One workable order
- Place a clean backing sheetA clean backing must be in place before any ink could penetrate the test sheet.
- Make separate test applicationsThe test applications must dry before the main inspection and handling.
- Let the ink dryInspect the dry reverse and backing as separate surfaces.
- Inspect reverse and backingStop after you have a dry normal sample, a heavier sample, and a note for each surface.
Which check needs to come first?
The example shows one workable order. A clean backing is not proof that the reverse has no bleed spots.
Keep a concise compatibility note
Stop after you have a dry normal sample, a heavier sample, and a note for each surface. Write a conclusion such as “fine for writing; avoid repeated fills” beside the test. Retest when a meaningful variable changes, such as a new ink refill or a different notebook paper. You don't need to repeat the whole exercise before every entry. The purpose is to establish an ordinary working boundary that protects the pages you want to use, while allowing you to keep materials whose minor show-through doesn't bother you.
Where this idea began
Want to follow the idea further? These community discussions and maker references are a good place to start.
- is this bleeding or just ghosting?
The search excerpt shows uncertainty about distinguishing heavy show-through from small bleed spots on thin paper.
- Glossary of Fountain Pen Terminology
Defines ghosting as show-through and bleed-through as ink penetrating to the reverse.
- Why Paper Matters
Explains that absorbency and thickness affect paper behavior in different ways.