Back to all guides

Guide 001 / Paper scrap systems

Before you buy journal pockets, check your desk.

Turn envelopes, wrappers, paper bags, glassine sleeves, and map scraps into easy pockets that make a journal page feel interactive without making it complicated.

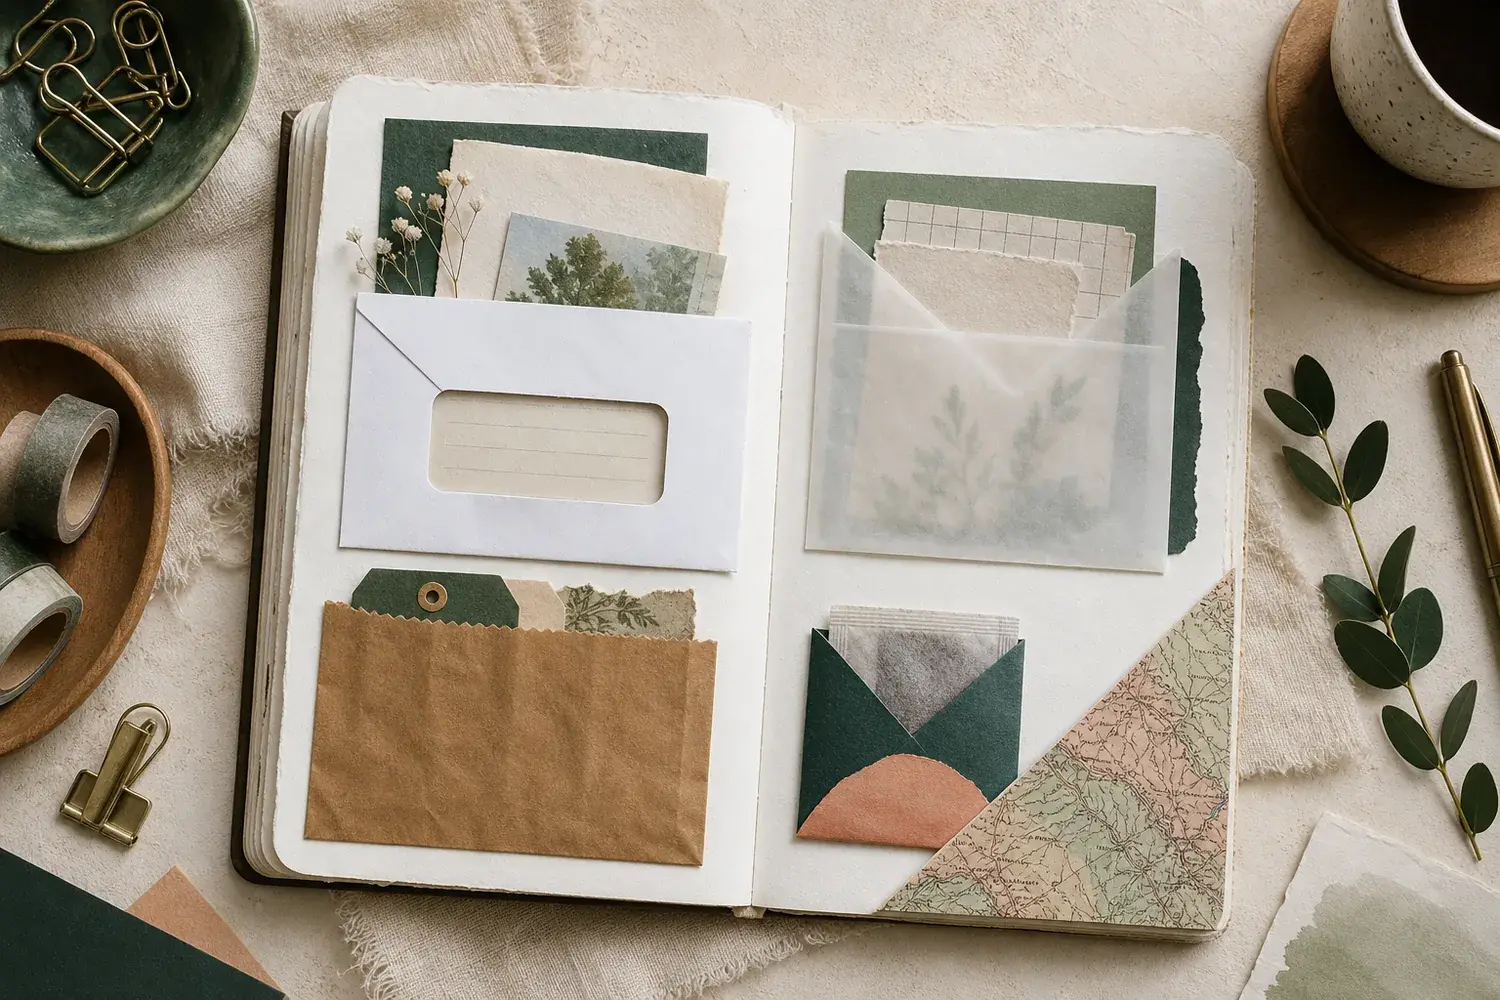
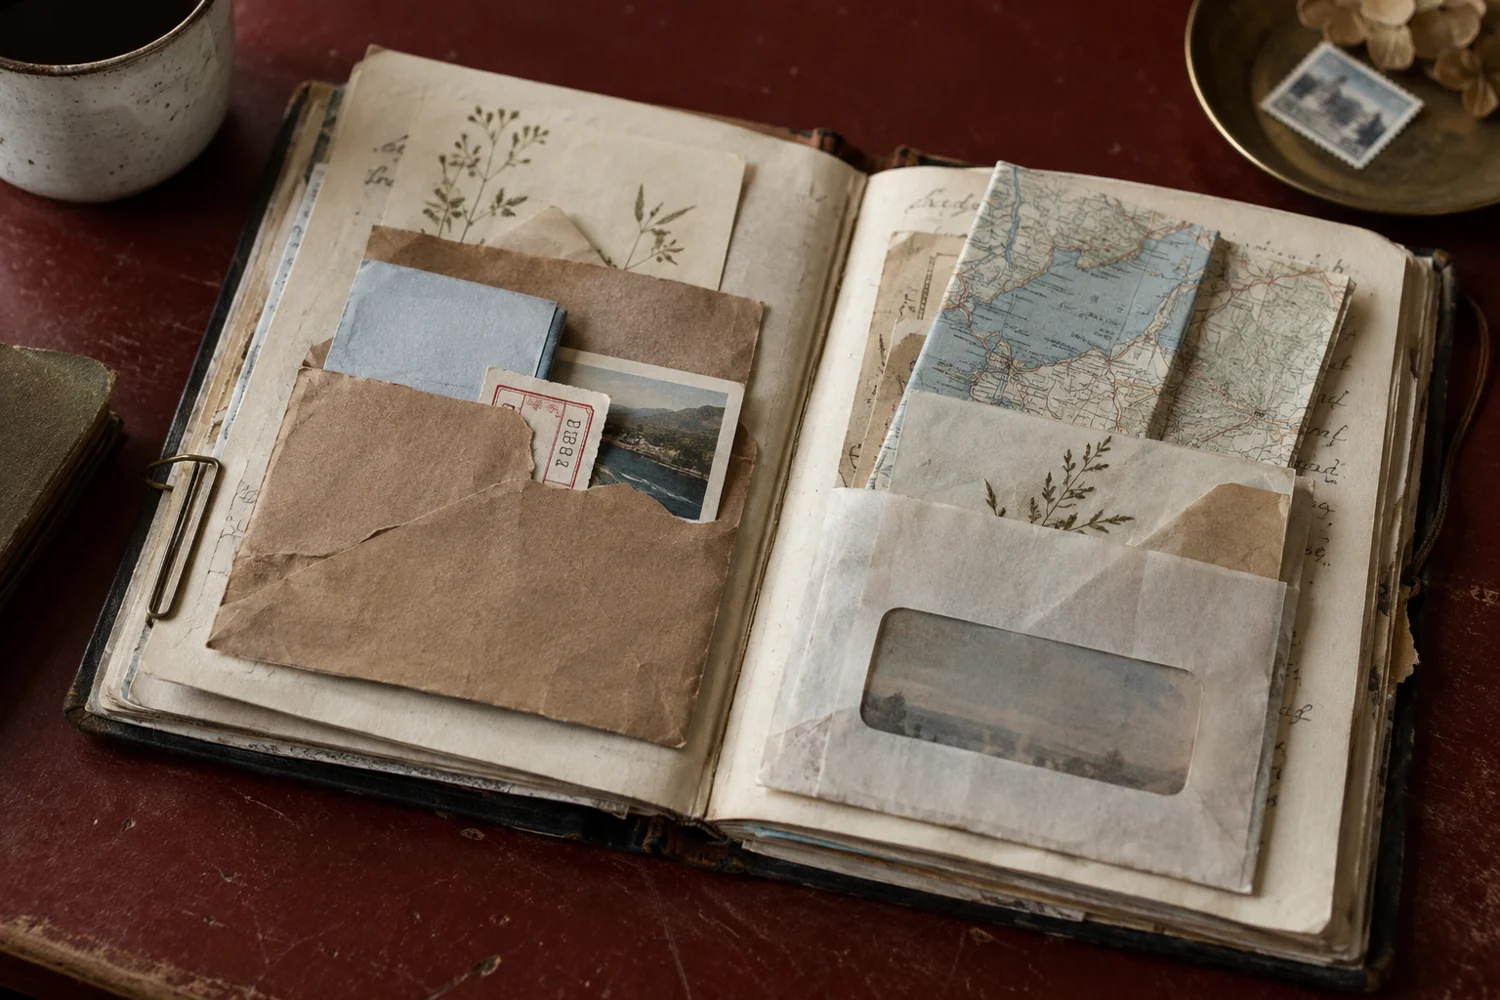
Open journal with several handmade paper pockets made from envelopes, kraft paper, glassine, and map scraps
Five pocket structures from everyday paper: window envelope, paper bag, tea wrapper, glassine, and map corner.

Before you buy another pack of ready-made journal pockets, look around your desk, your recycling pile, and the little papers you usually toss without thinking.

There might already be a pocket hiding there.

An old envelope. A clean tea wrapper. A brown paper bag. A glassine sleeve from stickers. A folded brochure from a museum day. A map scrap from a walk. These pieces may look ordinary, but many of them already have the one structure a pocket needs: paper that can hold something.

A journal pocket does not have to be a template. It does not have to be printed, scored, folded, decorated, and assembled from zero. Sometimes a pocket is simply three closed sides and one open side.

Once you start looking for that structure, you will notice pockets everywhere.

Recognize the pocket structure already hiding in everyday paper.

Use this when

Turn everyday paper into a usable pocket.

First build spec

Cut one clean envelope or paper bag piece to about 7 x 9 cm, tape only the left, right, and bottom edges, and let one tag peek out by 3-5 mm.

Avoid this when

When the insert is thick, oily, dirty, or irreplaceable.

Start with the scrap you already have.

If you only have a few minutes, do not read this like a supply list. Look at the paper in front of you and choose the easiest structure it already offers.

Window envelope

Make a framed pocket

Best for a date note, tiny photo, quote card, or receipt-shaped memory copy. The window creates a built-in focal point.

Go to recipe 1
Paper bag

Make a sturdy holder

Best for tags, sticker scraps, folded notes, and small photo cards. Use this when the insert has a little weight.

Go to recipe 2
Tea wrapper

Make a tiny memory pocket

Best for one mood word, a cafe note, a date strip, or a small gratitude line. Keep it intentionally small.

Go to recipe 3
Glassine sleeve

Make a soft reveal

Best for botanical scraps, neutral tags, soft photos, and hidden notes. Design the insert before you tape it down.

Go to recipe 4
Map or brochure

Make a place pocket

Best for walks, museum days, travel pages, and city notes. A diagonal corner pocket gives context without much writing.

Go to recipe 5
Plain scrap

Practice the basic rule

Best for the first attempt. Make a small rectangle, tape three sides, and leave one edge open.

Use the basic rule

The easiest first pocket

Choose either a window envelope or a paper bag. They are forgiving, easy to see as pockets, and strong enough to survive a few test inserts.

Do a 2-minute desk audit before you make anything.

The fastest way to find a pocket is to stop looking for pretty paper and start looking for structure. Pick up one scrap at a time and ask whether it already has an opening, a fold, a sealed edge, or a sleeve shape.

Keep Clean envelopes, glassine sleeves, small paper bags, card envelopes, tea wrappers, and folded brochures. These already have at least one usable edge, fold, or opening.
Trim first Oversized mailers, shopping bags, long receipts copied onto plain paper, and map brochures. Cut the most interesting 6-10 cm area before you decide the pocket shape.
Back it Thin wrappers, fragile old paper, and soft translucent sleeves. Add a slightly larger neutral paper behind it so the pocket survives handling.
Copy instead Thermal receipts, sentimental tickets, or papers with information you cannot replace. Use a scan or photocopy if fading, tearing, or losing the original would bother you.
Skip Oily packaging, food-stained paper, strong-smelling wrappers, or anything damp. If the material is not clean and dry, recreate the look with safe paper.
Use today The scrap that already suggests an insert: a window for a line, a bag for a tag, or a map corner for a place note. Do not save every scrap for later. Turn one into a pocket now.

A pocket is a small paper space that can hold something.

That is the whole definition. It does not need a special shape, a perfect fold, or a matching set of supplies. If a piece of paper can hold a tag, a memo, a ticket, a sticker sheet, a small photo, or one tiny note, it can become a journal pocket.

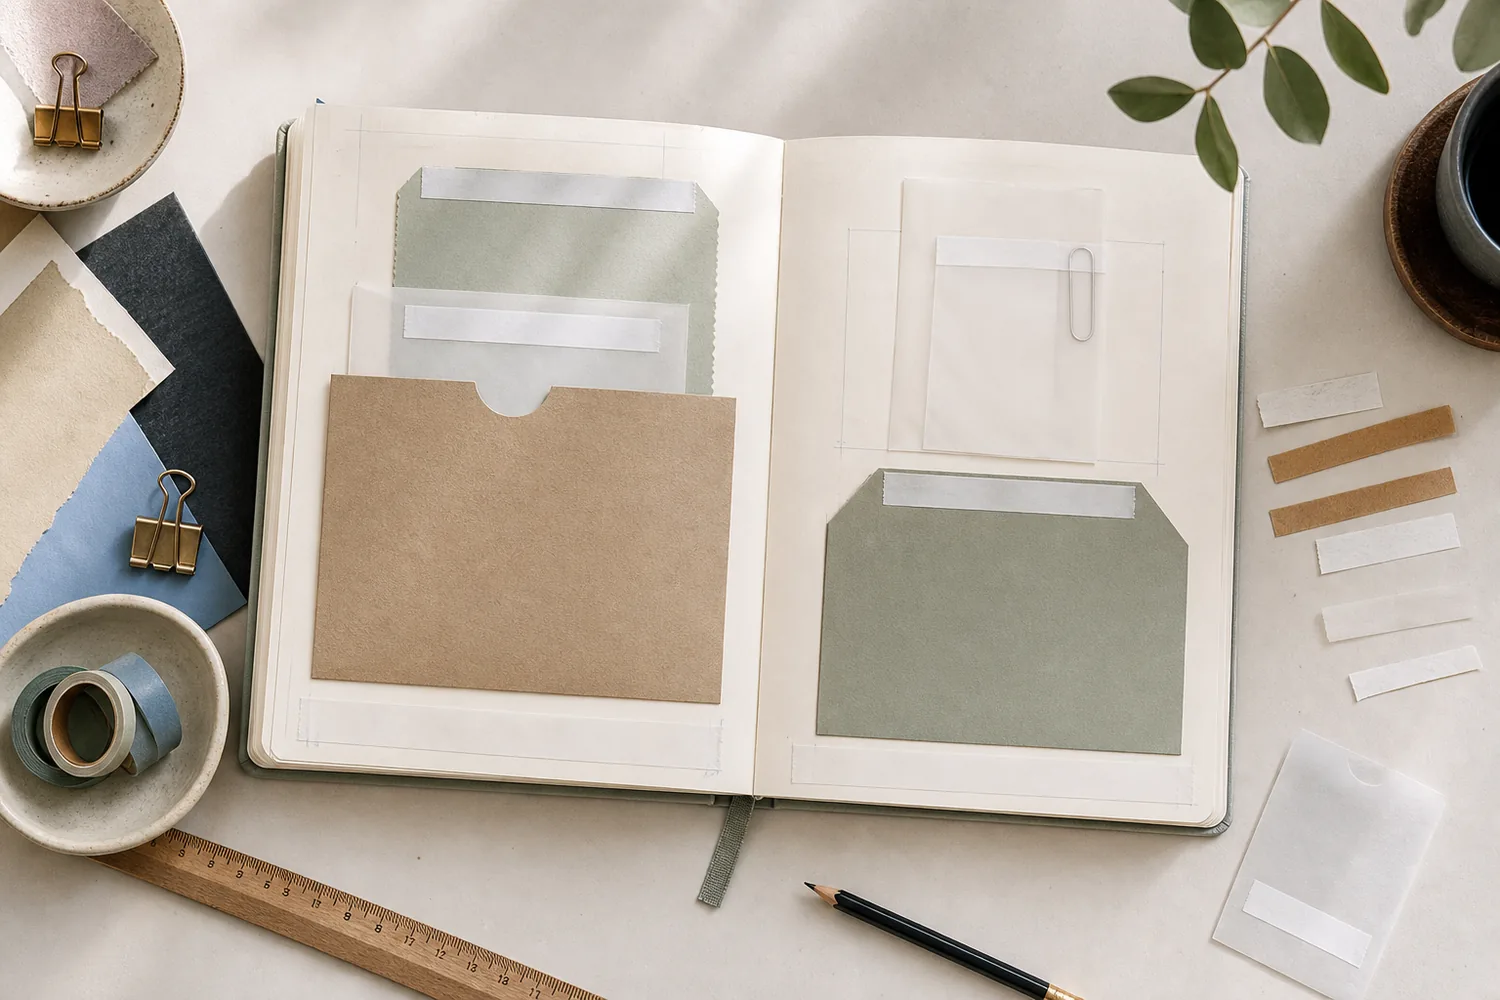
Simple kraft paper pocket taped on three sides with one blank tag peeking from the open top
The simplest structure: close the left, right, and bottom edges. Leave the top open.
01

Find the opening

Ask where the insert should slide in. Top openings are easiest. Side openings feel more like hidden notes. Diagonal openings work well in corners.

02

Check the closed sides

Many scraps already have sealed edges. Envelopes, bags, wrappers, and sleeves may give you one, two, or three closed sides before you add anything.

03

Tape only what is needed

Add thin adhesive to the sides that still need structure. Do not seal the side where the tag or note should enter.

The easiest method

  1. Find a paper piece that already has some structure.
  2. Trim it to the size your page can hold.
  3. Add thin double-sided tape to the sides and bottom.
  4. Leave one side open.
  5. Slide in a small note, tag, ticket, or photo so a little edge peeks out.

A good pocket is usually smaller than you think.

The pocket should fit the page, but it should also fit the insert. If the pocket is much bigger than the note inside, it looks empty. If it is too tight, the insert catches on the tape.

Small planner or memo page

4-6 cm wide

Use for tea wrappers, tiny labels, date strips, and one-word notes. Let the insert peek out by 3-5 mm.

B6 or travel journal

6-8 cm wide

Use for window envelope pieces, mini tags, small photos, and receipt-style cards. Keep the pocket below half the page height.

A5 journal page

8-11 cm wide

Use for paper bag pockets, glassine sleeves, and stronger focal pockets. Leave writing space around it so the page can breathe.

Width Make the pocket about 5-10 mm wider than the insert, so the note slides in without fighting the tape.
Reveal Let the insert show by a few millimeters. A small visible edge tells the reader the pocket is usable.
Thickness If the insert is thick, use paper bag or cardstock-backed pockets. Very thin scraps can wrinkle under heavy tags.

Paper scraps often make better pockets because they already have character.

A handmade pocket cut from plain cardstock can be beautiful, but it can also look too clean when the rest of the page is soft, worn, and collected. Reused paper brings texture before you add decoration. A mailer has a fold. A paper bag has a gusset. A tea wrapper has a sealed edge. A glassine sleeve has translucency. A map scrap carries a sense of place.

The goal is not to make trash look fancy. The goal is to notice useful paper structures before you throw them away.

Window envelopes Card envelopes Paper shopping bags Clean tea wrappers Glassine sleeves Map scraps Brochure folds Packaging sleeves Small paper bags Ticket folders

You do not need to collect everything. Start with one scrap that is clean, dry, and easy to cut. Make one pocket. If it works, repeat the structure later with a different paper.

Use light materials and make the pocket easy to open.

Most beginner pocket problems come from using too much adhesive, choosing paper that is too weak for the insert, or making the opening hard to see. Keep the construction light and obvious.

Thin double-sided tape

Best for everyday journal pages because it is clean, flat, and does not wrinkle the paper the way wet glue can.

Small scissors or craft knife

Scissors are enough for most pockets. A craft knife helps when trimming around envelope windows or cutting a clean notch.

Bone folder or ruler edge

Useful for flattening folds and pressing taped edges without adding shine from your fingers.

Scrap paper for inserts

Test the pocket with a tag or memo before you attach it permanently. The insert should slide in easily.

A quick preservation note

Everyday journal pages

Clean scraps, thin double-sided tape, and ordinary inserts are fine when the page is meant to be handled, layered, and enjoyed now.

Keepsake or archival pages

For irreplaceable photos, family documents, and anything you want to preserve for decades, use a copy or a safer sleeve instead of taping the original down.

Simple rule: decorate with the scrap, but protect the original when the memory cannot be replaced.

Window envelope pocket

A window envelope is one of the easiest scraps to turn into a journal pocket because the clear window does part of the composition work for you. It creates a built-in frame, lets a note show through, and makes a plain insert feel intentional.

Window envelope pocket attached to a journal page with three taped edges and a blank note behind the window
A window envelope works best when the note behind the window is calm and simple.

What you need

  • One clean window envelope
  • Scissors or a craft knife
  • Thin double-sided tape
  • A small note, tag, or journaling card

Best inserts

  • A date note
  • A one-line memory
  • A tiny photo
  • A receipt-style card copy
  • A ticket stub or quote card

How to make it

  1. Choose the best window area. Look for a part of the envelope with enough paper around the plastic window. If the window sits too close to the edge, the pocket may feel flimsy after cutting.
  2. Cut a generous rectangle. Leave at least a small border around the clear window. You can trim it smaller later, but you cannot add stability back once you cut too close.
  3. Test the insert behind the window. Slide a blank note behind the window before attaching anything. The visible part should look calm. One line, one date, or one small photo detail is enough.
  4. Tape three sides. Add tape to the left, right, and bottom edges. Keep the top open. If the envelope paper is very thin, put the tape slightly inward so adhesive does not squeeze out.
  5. Attach and press. Place the pocket on the page, press the taped edges with a ruler or bone folder, then slide the insert in from the top.

Variations

Turn the pocket sideways for a side-opening note. Use the envelope flap as a decorative layer behind the window. Add a grid paper backing if the white envelope feels too plain. If the plastic window is scratched, place a darker insert behind it so the scuffs feel softer.

Use this pocket on

A day-summary page, a monthly memory page, a receipt-inspired layout, or any spread where one short line should become the focal point.

Paper bag pocket

Brown paper bags are stronger than ordinary copy paper, which makes them useful when the insert is a little heavier: a tag, a small photo card, a sticker backing, a folded note, or several paper scraps. The folded bottom of a bag can become built-in depth, so do not flatten it away too quickly.

Brown paper bag pocket and tea wrapper mini pocket holding blank tags and paper strips
Paper bag pockets can hold larger tags. Tea wrapper pockets are better for one tiny insert.

What you need

  • A small paper bag or shopping bag section
  • Scissors
  • Thin double-sided tape
  • A tag, memo, or small card
  • Optional label, pen, or washi tape

Best uses

  • Holding layered tags
  • Saving sticker scraps
  • Making a sturdy focal point
  • Adding warmth to a neutral page

How to make it

  1. Cut from the bottom when you can. A bag bottom already has folds that create a little depth. This is useful if your insert is thicker than one sheet of paper.
  2. Trim the height. A good beginner pocket usually covers one third to one half of the page height. If it is too tall, the page will feel heavy.
  3. Decide the opening shape. Leave it straight for a clean look, cut a shallow half-circle notch for a library-card feel, or cut a slanted opening for a more casual scrap style.
  4. Tape the loose sides. If the bottom fold is already secure, tape only the side edges. If the bottom feels loose, add one narrow strip of tape inside the fold.
  5. Add one finishing detail. A tiny blank label, a drawn stitch line, or one strip of grid paper is enough. Kraft paper already has texture, so it does not need much.

Make it look finished

The notch is the easiest upgrade. It tells the eye where the pocket opens. Cut a half-circle, shallow V, slanted edge, or soft curve. Keep the cut simple and let the paper texture do the rest.

Use this pocket on

A materials page, a craft session record, a mail day spread, or any journal page that needs to hold more than one thin paper piece.

Tea wrapper mini pocket

Tea wrappers are already small, already folded, and often sealed on several sides. That makes them perfect for mini pockets. They are not meant to hold a lot. They are for one small word, one date, one sticker scrap, or one tiny memory.

What you need

  • One clean, dry tea wrapper
  • Scissors
  • Thin double-sided tape
  • A tiny tag, memo strip, or label piece

Best inserts

  • A date
  • A mood word
  • A cafe memory
  • A mini gratitude note
  • A one-line prompt

How to make it

  1. Open carefully. Remove the tea bag without tearing the whole wrapper apart. If one side opens naturally, use that as the pocket opening.
  2. Flatten gently. Press it under a heavy book for a few minutes if it is crinkled. Do not iron coated packaging.
  3. Trim only what is messy. Keep as much of the original wrapper shape as possible. The small scale is the charm.
  4. Reinforce weak sides. If a side split open, add a narrow line of tape inside. Keep the top open.
  5. Use one tiny insert. Let the insert peek out slightly. A mini pocket looks special when it is not overfilled.
rainy morning slow tea felt lucky after a long day one good thing

Use this pocket on

A cafe page, a slow morning record, a rainy day memo, or a tiny mood log where one phrase is enough.

Glassine pocket

Glassine is quiet because it hides and reveals at the same time. Unlike clear plastic, it does not show everything sharply. It softens the insert, which makes it especially useful for gentle pages, botanical scraps, neutral notes, and small photos that need a little atmosphere.

Translucent glassine pocket and map scrap corner pocket on a cream journal page
Glassine softens the insert. A map corner pocket adds place and direction.

What you need

  • A glassine envelope or translucent sleeve
  • Thin double-sided tape
  • A simple note, photo, paper scrap, or tag
  • Optional pull tab or small label

Best inserts

  • Handwritten notes
  • Small photos
  • Botanical paper
  • Neutral tags
  • Soft patterned scraps

How to make it

  1. Design the insert first. Because glassine is translucent, the insert becomes part of the pocket design. Busy inserts can look muddy through the paper.
  2. Choose the opening direction. Top openings are simple. Side openings feel more private. A flap can stay loose if you want the page to feel interactive.
  3. Attach from the back when possible. Tape hidden behind the glassine looks cleaner than tape across the front. If the sleeve is very thin, use shorter tape pieces instead of one long strip.
  4. Add a pull tab. Fold a tiny strip over the insert, use a half-circle label, or fold washi tape over the top. Let it peek out just enough to invite the reader to pull.

Use this pocket on

A soft botanical page, a private note page, a photo page, or any spread where you want the insert to feel partly hidden.

Map scrap corner pocket

Map scraps, brochures, and printed travel papers make excellent story pockets because they immediately suggest place. Even a small corner can carry the feeling of a city walk, a museum day, a train ride, or a cafe you want to remember.

What you need

  • A map scrap, brochure piece, or printed paper
  • Scissors or craft knife
  • Thin double-sided tape
  • A note, ticket, receipt copy, or photo

Best inserts

  • A walking route note
  • A cafe name
  • A museum ticket copy
  • A small photo
  • A place card

How to make it

  1. Cut a triangle or diagonal shape. The diagonal edge becomes the opening. Keep the two straight edges large enough to tape securely to the page corner.
  2. Place it in a page corner. Bottom corners feel stable. Top corners can work for lighter inserts, but heavy cards may slide out more easily.
  3. Tape only the page-edge sides. Tape the bottom and side edges that touch the journal page. Leave the diagonal edge open.
  4. Test the insert angle. Slide the note in and check whether it catches. If the diagonal opening is too shallow, trim it a little wider.
  5. Add context with one phrase. A map pocket does not need a long explanation. A small line like "a little walk" or "where we stopped" is enough.

Use this pocket on

A travel journal, city walk page, museum visit, cafe route, or any page where the place matters as much as the note.

Use this formula to make any pocket look polished.

The pocket can stay simple. The finish is what makes it look considered. Use this formula when a scrap pocket feels useful but visually unfinished:

Base layer + Tiny label + Visible insert

1. Add a base layer

If the pocket feels thin or visually weak, place it on top of another paper. Cut the base layer slightly larger than the pocket. Even a 2 to 3 mm border can make the pocket feel intentional.

Good base papers: kraft paper, cream paper, grid paper, tracing paper, old book paper, neutral patterned paper.

2. Add one tiny label

A label gives the pocket a role. Try short words like keep, today, found, note, little things, date, memory, or saved. Do not label every layer. One label is enough.

3. Let something peek out

A pocket looks useful when the insert is visible. Let a tag or paper strip peek out by a few millimeters. Too much reveal feels messy; too little reveal makes the pocket hard to read as a pocket.

Three simple ways to place pockets on a journal page.

01

Corner pocket

Place a diagonal pocket in the bottom corner. Best for map scraps, brochure pieces, card envelopes, and paper bag corners. It feels stable and leaves room for writing above it.

02

Center pocket

Place one pocket in the middle and let it become the page focus. Best for window envelopes, glassine sleeves, and paper bag pockets. Add a short note above or below.

03

Side strip pocket

Place a tall narrow pocket along the page edge. Best for long tags, journaling strips, tickets, and sticker scraps. It keeps the page organized without filling the center.

Small mistakes that make paper pockets harder to use.

Do not tape all four sides.

If every side is sealed, it is no longer a pocket. Always leave one clear opening. Before pressing the pocket down, slide the insert in once to confirm the direction.

Do not overfill it.

One to three small inserts are usually enough. If the pocket becomes bulky, the journal page may not close well and the taped edges can lift.

Do not use oily or dirty packaging.

Use clean, dry paper only. Avoid food packaging with oil, smell, or residue. If you love the look, recreate the color or shape with clean paper instead.

Be careful with thermal receipts.

Thermal receipt paper can fade, darken, and react to heat, light, friction, and some plastics. If the receipt matters, make a scan or photocopy and journal with the copy.

Do not overdecorate every edge.

A scrap already has texture. Choose one focus detail: a notch, a tab, a label, a visible note, or a torn base layer. Let the rest stay quiet.

If the pocket does not feel right, adjust one thing.

Insert gets stuck Move the tape farther from the opening or trim the insert narrower.
Pocket edge lifts Use shorter tape pieces and press firmly. Heavy inserts may need a stronger paper base.
Pocket looks random Add a base layer, one label, or a small notch to make the opening clear.
Page feels bulky Use one insert, switch to thinner paper, or move the pocket closer to the outside edge.
Colors feel too busy Choose one dominant scrap and make the insert plain.

Make one pocket without turning it into a project.

  1. Minute 1: Pick one clean scrap that already has an edge, fold, window, or sleeve.
  2. Minute 2: Decide the opening direction before cutting.
  3. Minutes 3-4: Trim the pocket and test it with a scrap insert.
  4. Minutes 5-6: Tape only the closed sides and attach it to the page.
  5. Minutes 7-8: Write one small note or date for the insert.
  6. Minutes 9-10: Add one finishing detail, then stop.

The stopping point matters. A small pocket is supposed to make journaling easier. If you keep adding layers until the page feels heavy, the pocket has stopped doing its job.

Sometimes it is already a pocket.

You do not need to buy journal pockets every time you want to add something interactive to a page. A pocket can be hidden in an envelope. It can be folded into a paper bag. It can be waiting inside a tea wrapper. It can be softened by glassine. It can be cut from a map scrap.

The more you journal, the more you start seeing paper differently. An envelope is not just an envelope. A wrapper is not just a wrapper. A scrap is not always a scrap.

Sometimes, it is already a pocket. You just have to notice it before you throw it away.

Run the three-part finish check.

Does it work?

Open, lift, slide, or pull the structure five times before adding more decoration.

Does it stay flat?

Close the journal or press the page lightly. If it bulges, remove one layer or one insert.

Is the cue clear?

The reader should know where to lift, pull, slide, or look without guessing.

Sources used while expanding this guide

This is a creative journaling guide, not a conservation manual. The practical pocket recipes come from paper craft practice, while the caution notes are based on preservation guidance for paper, adhesives, and thermal papers.

The No-Glue Zone: Where Adhesive Belongs on Pockets, Sleeves, and Clips

Learn where adhesive belongs before a handmade pocket, sleeve, or altered clip accidentally seals itself shut.

Continue reading qq{

Get the next guide when it is published.

Join the update list for new tiny journaling guides, field notes, and practical archive notes.

Join the Update List
}