Gather a few things See what you’ll need
- A pen
- Your journal
- One small question you want to notice for a few days
Choose an exercise 3 things to try as you read
Make the question small enough to answer
“How am I doing?” is a hard question to squeeze into a row of circles. “Did I read today?” gives each circle a clear job. So does “Which stage of this little project am I on?” or “How much energy did I have this evening?”
Write the question beside the row, with any boundary you will need later. Does “read today” include an audiobook, or are you recording time with a printed book? Either can be your question. Keep its meaning steady for this row; if it changes, date the change rather than silently reinterpreting earlier marks.
ONE WORKED EXAMPLE
A reading week with one unknown day
You want to remember whether you read during one busy week. A seven-circle strip sits beside the book title and your dated evening notes.
Before
One evening is missing from memory. Leaving it looking like an unfinished task would make the row harder to interpret later.
After
The row has dated day labels, checks for remembered reading and a dash for the unrecorded evening. Its key says “check: read; open: not yet; dash: not recorded.” Underneath, you note that the book stayed beside the sofa.
What changed—and what to check
The key lets the marks describe their actual status. The nearby sentence adds context without making the row explain why reading happened.
Try this check. Point to the forgotten day and check that its mark cannot be mistaken for a remembered no.
Match the row to what you’re recording
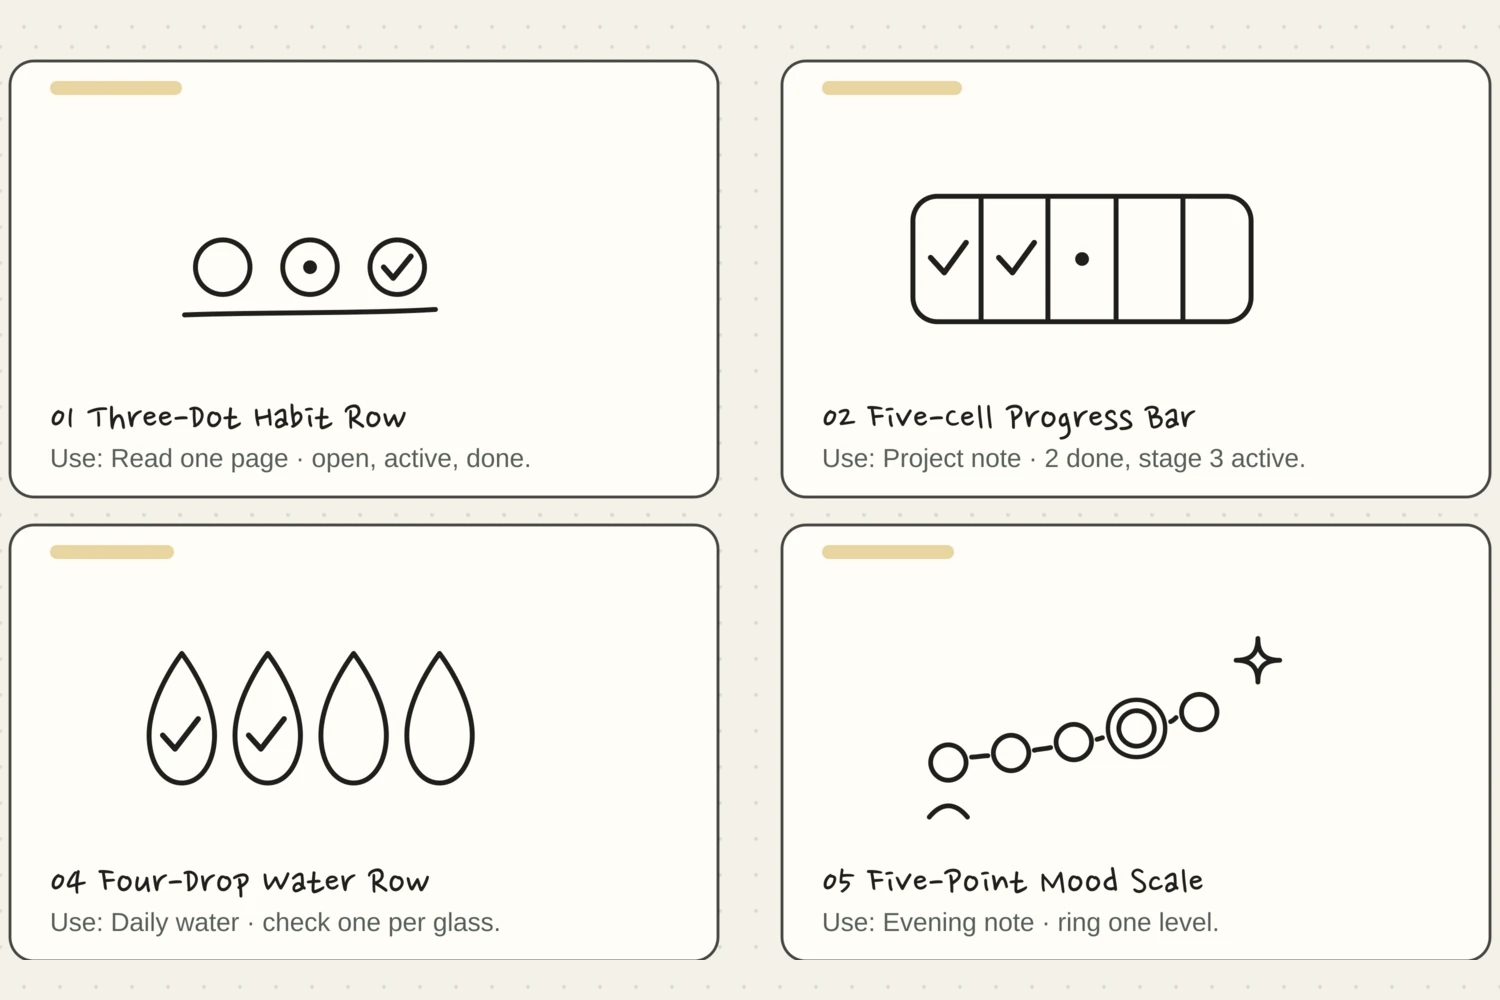
The twelve drawing examples below offer different ways to make a small record. A seven-circle strip can hold a week. A five-cell bar can hold five named stages of a project. A short energy scale lets you choose one impression of a day.
Notice the difference between a count and a state. Four water drops can count four drinks of a size you’ve defined; they don’t prescribe how much anyone should drink. Three habit circles can show waiting, active, and done. Decide what each position means before you start marking it.
Try a what-ifThe question changed halfway through
The question changed halfway through
Help this reader keep both versions understandable.
Monday’s key counts printed reading. On Thursday, the reader decides to count audiobook listening too, but cannot remember every earlier listening session.
Compare the three choices
How can the row keep an honest meaning?
- Change earlier empty circles to checks where listening seems likely
Likely is different from remembered. Leave those days as originally recorded, or mark uncertainty explicitly.
- Date the new definition beside Thursday
This preserves what earlier marks meant and explains the new ones. A fresh row can use the broader question throughout.
- Broaden the heading for the whole week
That is tidy, but it would imply the earlier marks included listening when they did not.
When the question changes, keep a dated boundary between the meanings.
What would you try?
Choose an option to see what it would do. You can explore all three.
Try it beside the sentence it belongs to
Choose one example, press Draw it, and copy the stages on scrap paper. You can pause or step through the drawing whenever you need to. Practice around 35–45 mm wide, leaving enough space inside the circles or cells for the marks you’ll add later.
Then place it near the relevant words in your notebook: beside a book title, below a weekly heading, or after an evening note. Don’t fill your next several pages with copies yet. One short run will tell you whether you like living with this particular tracker.
Let the marks describe the day you had
Add the mark while the detail is still fresh. If you miss a day and can’t remember, leave it unknown rather than guessing to make the row look complete. A small dash can mean “not recorded” if you’d like to distinguish it from a clear no.
When you’re recording a time or amount, keep the actual number nearby if it matters. The little sleep drawing, for example, becomes much easier to understand with written bedtime and waking time. A decorative scale is only as precise as the meaning you give its positions.
Try the exampleLeave an unremembered day unknown
Leave an unremembered day unknown
Change each day between recorded yes, recorded no, and unknown. Notice how the summary changes without treating every blank as a no.
Read the words in this example
- ONE WEEK, AS RECORDED
- Mon
- Yes
- Tue
- No
- Wed
- —
- Thu
- Yes
- Fri
- —
- Sat
- —
- Sun
- —
2 yes, 1 no, 4 not recorded.
A blank day means you haven't recorded an answer. It does not tell us what happened. This is a sample seven-day record. Unknown can mean not yet recorded or not remembered; a short row cannot explain why a day went as it did.
- I read
- 2
- I did not read
- 1
- Not recorded
- 4
Look for a useful detail, not a perfect streak
Read the row with the week’s notes beside it. “I read on the three evenings the book was by the sofa” describes what the pages show. It is a possible next experiment, not proof that the sofa caused the reading. Check whether an empty circle meant no, not yet, or a day you could not remember.
One sentence underneath can capture what you want to try next: “Leave the book where I sit after dinner.” If nothing useful stands out, that’s fine too. You’ve learned that this particular question may not need a daily record.
Write your versionTurn the row into one useful observation
Turn the row into one useful observation
Edit the sample to separate what was recorded from what your notes suggest. Keep the next experiment small enough to try.
Reading is recorded on two evenings.
Both mention sitting on the sofa with a book.
Leave my book beside the sofa.
Your words have a place now.
A short record suggests questions; it does not prove why something happened. It is also fine to stop tracking a question that no longer helps.
- Words on this card
- 21
GO A LITTLE FURTHERMake the next version easier
Make the next version easier
If the cells are too cramped, enlarge them. If you keep forgetting which symbol means what, use a simple check and a written label. If daily updating feels unnecessary, try recording only the occasions you care about, such as each finished book or completed project stage.
Before drawing another row, decide whether you still want this answer. You might prefer one dated line for each finished book, with room for its title. Keep the old key beside the old marks, even if you choose a different record next week; that is what will make both pages readable later.
Pick a drawing and follow along
Choose a drawing below. Watch the whole shape appear, or tap a numbered step to see just that part. The faint outline is there if you’d like a little guidance.
Pick a drawing. We’ll take it one stroke at a time.
Three-Dot Habit Row
Exactly three roomy circles show an open habit, an active habit with a center dot, and a completed habit with a check. A separate baseline keeps the row tidy. Tiny Systems Co. light tracker.
The finished drawing. Watch it once, then try one step at a time.
Let’s draw it together.
Give it a place.Use the states beside a small habit such as reading one page: open, active, then done.
If the line wandersKeep white paper between the circles and the baseline. Lower the line instead of shrinking the states.
Five-Cell Progress Bar
One low rounded bar contains exactly five equal stages: two checked, one active dot, and two open. Tiny Systems Co. project accent.
The finished drawing. Watch it once, then try one step at a time.
Let’s draw it together.
Give it a place.Let the five cells stand for five milestones, such as idea, sketch, write, print, and bind.
If the line wandersMark the four divider positions lightly in your mind before drawing. Keep every divider vertical and every cell equally wide.
Seven-Circle Week Strip
A small flag introduces a habit-name rail above exactly seven day circles. Three days are checked and the fourth is active. Tiny Systems Co. weekly row.
The finished drawing. Watch it once, then try one step at a time.
Let’s draw it together.
Give it a place.Write a habit on the rail, then use one circle for each day from Monday through Sunday.
If the line wandersKeep all seven circles the same size. If the row runs wide, reduce the gaps evenly across the whole week.
Four-Drop Water Row
Four broad water drops form a simple pictorial count. The first two contain checks; two remain open. Tiny Systems Co. daily hydration mark.
The finished drawing. Watch it once, then try one step at a time.
Let’s draw it together.
Give it a place.Let each drop stand for one glass or bottle, using a size that makes sense for your own note.
If the line wandersGive each drop a pointed top and a rounded bottom. Keep the checks away from the edges.
Five-Point Mood Scale
Exactly five open points rise from a low mood arc toward a bright spark. Four short connectors preserve the gaps, and a broad ring selects the middle point. Tiny Systems Co. evening scale.
The finished drawing. Watch it once, then try one step at a time.
Let’s draw it together.
Give it a place.Add it beside one sentence about the day and ring the point that matches your impression.
If the line wandersKeep every connector away from the points and the selection ring. Shorten a connector instead of shrinking a state.
Ten-Page Reading Meter
An open book sits beside exactly ten cells in two rows of five. Three cells are checked and the fourth is active. Each cell represents ten pages, for a 100-page goal. Tiny Systems Co. reading meter.
The finished drawing. Watch it once, then try one step at a time.
Let’s draw it together.
Give it a place.Put it beside a book title and check one cell at pages 10, 20, 30, and onward.
If the line wandersKeep the two rows aligned and leave room for a check inside each cell. The book needs only one shared spine.
Moon-to-Sun Sleep Line
A crescent and a small four-ray sun frame six evenly spaced time positions. A shallow arc spans the example sleep interval, from a bedtime dot at 22:00 to a waking check at 08:00. Tiny Systems Co. sleep accent.
The finished drawing. Watch it once, then try one step at a time.
Let’s draw it together.
Give it a place.Keep the same six time labels across nights. Move the bedtime dot, waking check, and arc endpoints to match that night’s interval.
If the line wandersSet the first and last circles before dividing the gap into five equal spaces. Keep the duration arc above the circles.
Seven-Coin Spending Week
A small wallet introduces exactly seven day coins. A center dot means no discretionary spend; one short slash means a spend day. Five future days stay open. Tiny Systems Co. spending accent.
The finished drawing. Watch it once, then try one step at a time.
Let’s draw it together.
Give it a place.Use one coin per day of the week. Dot a no-spend day, slash a spend day, and leave future days open.
If the line wandersKeep every state mark short and centered. Each coin needs only one dot or one slash.
Four-Stage Growth Row
A seed is followed by one-leaf, two-leaf, and three-leaf sprouts. Exactly four distinct stages stay open above a quiet ground line. Tiny Systems Co. growth accent.
The finished drawing. Watch it once, then try one step at a time.
Let’s draw it together.
Give it a place.Use it beside a learning or plant-care note and circle the stage that feels current.
If the line wandersMake each later stem taller. If two leaves crowd, widen their angle instead of filling the gap with more lines.
Three-Round Focus Set
Three matching timer dials show queued, active, and completed focus rounds. A short arc and rising hand mark an active round; one lower stroke turns that hand into a completion check. Tiny Systems Co. focus accent.
The finished drawing. Watch it once, then try one step at a time.
Let’s draw it together.
Give it a place.Use the set beside a study or writing task. Leave a round open, add its arc and hand while active, then add the short check arm when done.
If the line wandersKeep each arc above and left of its hand. The final lower stroke should meet the hand once, without crossing it.
Seven-Bar Weather Strip
Exactly seven round-capped daily bars rise from one gently curved baseline. Taller means warmer. A separate triangle marks the fourth day without changing its value. Tiny Systems Co. temperature accent.
The finished drawing. Watch it once, then try one step at a time.
Let’s draw it together.
Give it a place.Place it beneath a weekly heading and use Monday through Sunday from left to right. Keep temperature as the single metric for every bar.
If the line wandersStart each bar exactly on the baseline. Correct a lean by keeping its start and top height; do not add weather symbols.
Four-Star Energy Scale
Four open four-point stars increase steadily in size. A broad ring selects the third level while keeping clear of every tip. Tiny Systems Co. day-end accent.
The finished drawing. Watch it once, then try one step at a time.
Let’s draw it together.
Give it a place.Put it beside an evening date and ring one level, from the smallest drained star to the largest bright star.
If the line wandersKeep the stars on the same center line. Widen the selection ring before changing the selected star.
Something for a future page?
The Washi Tape ShopAffiliate links: we may earn a commission if you buy through these links.
Where this idea began
All drawing geometry is original to Tiny Systems Co. These Bullet Journal references informed the focus on simple marks, visible next actions, regular review, and a system that stays useful without becoming a separate project.
Want to explore the techniques a little further? Here are the maker tutorials and references behind this guide.
- Method referenceBullet Journal: Simple Time Management
A Bullet Journal time-management reference behind simple planning and review choices.
- Method referenceBullet Journal: What Is the Bullet Journal Method?
Official overview of logs, collections, indexing, and review; original decorative cues are separate.