Gather a few things See what you’ll need
- Thin paper scraps
- A 15 × 20 cm paper base
- Glue stick
- Ruler and pencil
- Scissors
Give the future pieces somewhere to go
Before covering anything, choose two or three real uses. Perhaps you need a narrow date strip, a small panel beside a photograph, and a pair of labels. Measure those spaces in the notebook. A masterboard can be wonderfully unplanned visually while still having a practical destination.
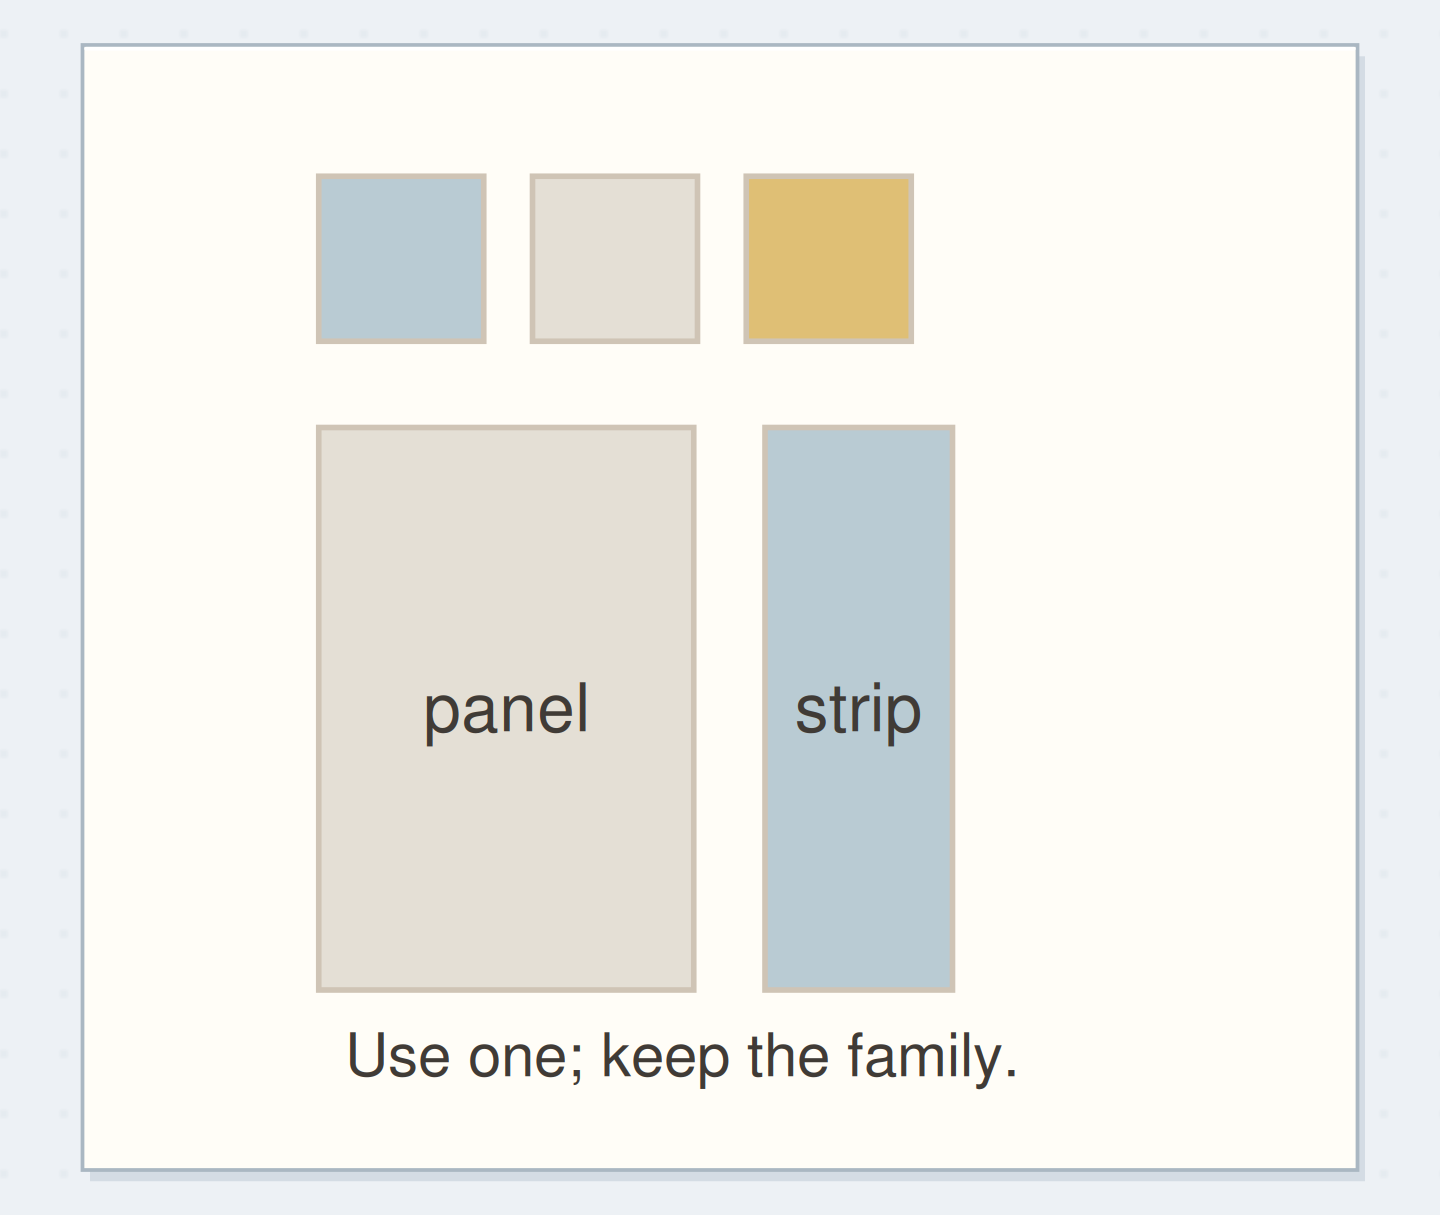
For the worked example, use a 15 × 20 cm base. Reserve a 15 × 5 cm strip across its top for three 5 × 5 cm squares. The remaining 15 × 15 cm area will become one 10 × 15 cm panel and a 5 × 15 cm strip. Pencil this plan on the reverse.
Start with a backing that bends
Use ordinary drawing paper, a plain used sheet with no important information, or a thin unwanted patterned sheet. A cereal box makes a sturdy card, but that stiffness is unnecessary for a page decoration. Bend your base gently and imagine it turning with the notebook leaf.
Choose roughly eight scraps: several quiet pieces large enough to cover ground, two contrasting prints, and a small accent color. The numbers are a starting limit, not a recipe you must obey. Remove bulky stickers, staples, and thick adhesive before treating any found piece as flat paper.
Follow the sheet into its smaller pieces
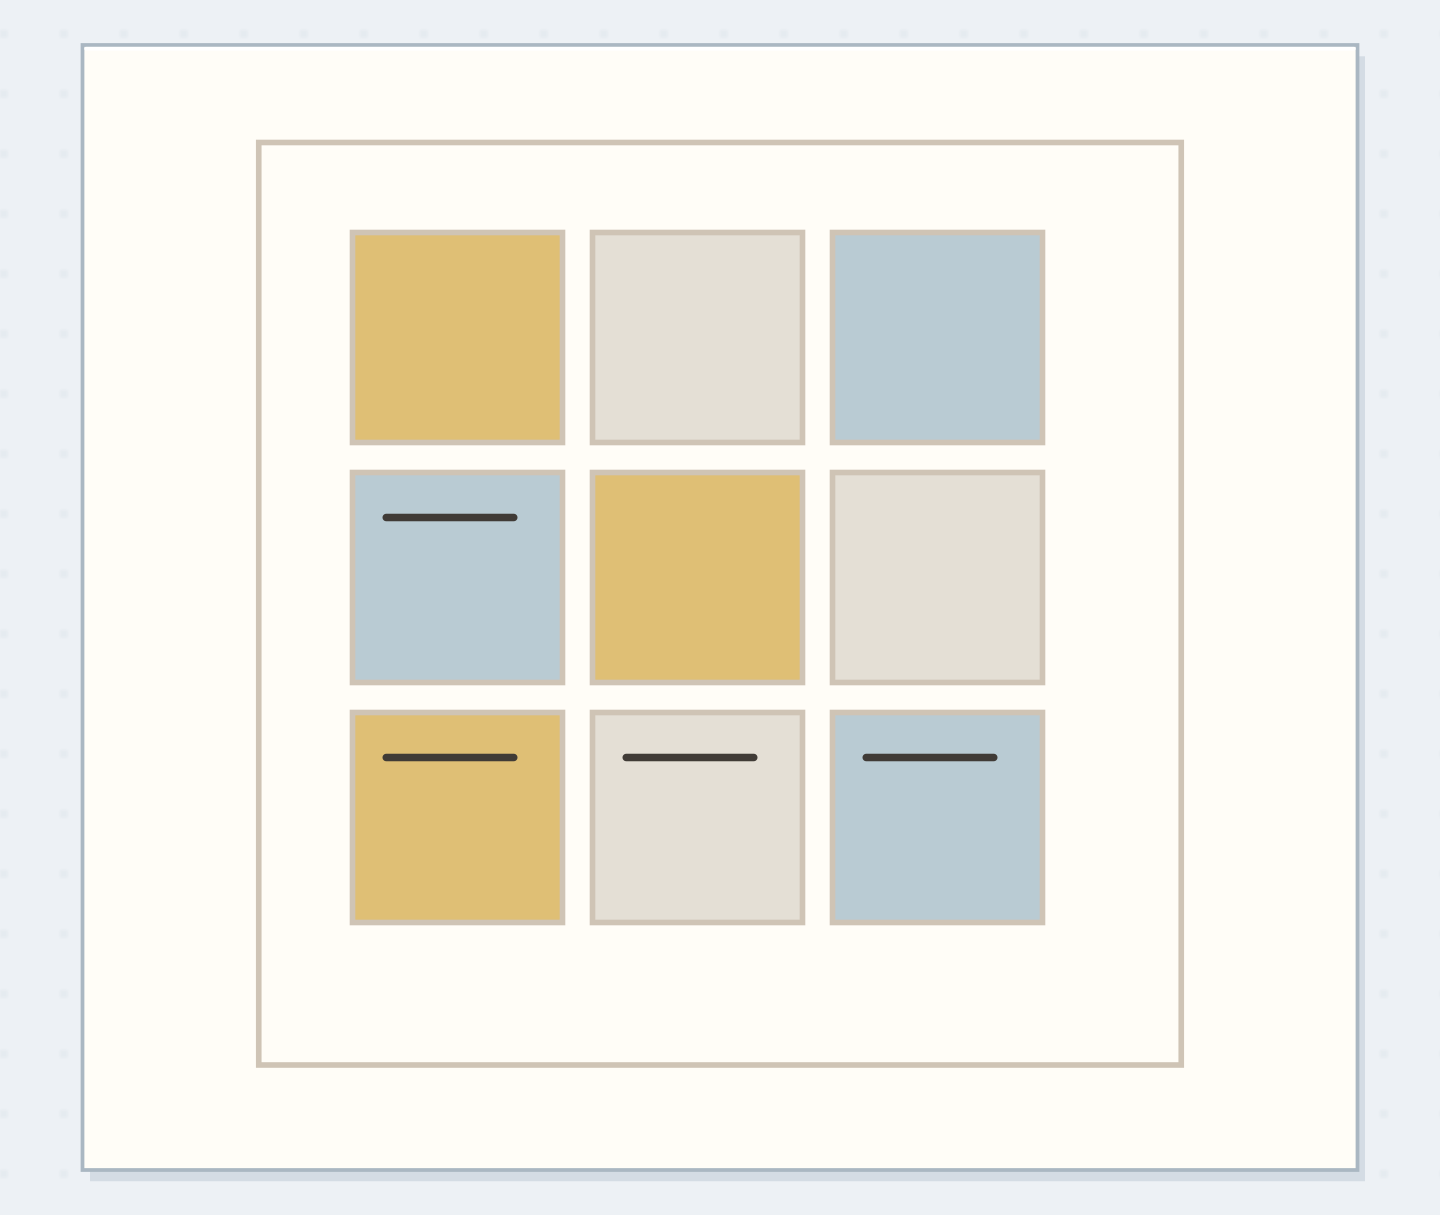
See how one 15 × 20 cm source sheet supplies three squares, a panel, and a strip.
Choose the 15 × 20 cm base before covering it.
A 15 by 20 cm base with a planned destination. Use the article measurements for the physical version; the drawing is a schematic.
“The first finished piece belongs on a page, not back in the scrap pile.”
Cover the sheet in broad areas first
Place the broadest scraps first, keeping overlaps shallow. Work from one side toward the other so loose pieces don't drift under your hand. Cover the back of each scrap with a light, even glue-stick layer, especially near its edges, then smooth it onto the base through clean waste paper.
Let one print appear in several places instead of putting every pattern in a separate corner. Avoid making a precious little picture across a planned cutting line. The sheet needs interesting fragments, not a centerpiece that you will feel obliged to preserve whole. Leave decorative stitching and raised additions until after cutting.
Order the steps: measure destinations first
Check the physical dependencies in this scraps example. Reorder the actions before trying the paper version.
One workable order
- Measure destinationsThe destination sizes determine the cut map.
- Glue thin scrapsThin scraps must be attached before the sheet can be cut as one surface.
- Let adhesive dryWet adhesive can shift the layers while scissors pass through them.
- Cut the planned piecesCutting releases the measured pieces after the adhesive is dry.
Which check needs to come first?
The example shows one workable order. Cutting releases the measured pieces after the adhesive is dry.
A blue-and-cream set for a rainy afternoon
Try cream envelope paper, a blue margin from a leaflet, and a scrap of printed grey text. Spread cream across most of the sheet; repeat blue in three separated areas. Add two short, dark pencil lines after the adhesive dries. These original choices suggest rainy light without requiring weather illustrations.
Cut the dry top strip into its three squares. Cut the remaining area at the 10 cm mark to release the large panel and narrow strip. Put one square beside a caption, the panel behind a small photograph, and the strip along the edge of a list. Save the other squares together.
Plan place for the panel
Write a real destination for the panel and a sentence that one square will support.
Place for the panel:Beside the rainy-afternoon photograph
First square will support:The sentence about staying for another cup.
Your words have a place now.
Write a real destination for the panel and a sentence that one square will support.
- Words on this card
- 19
Fix the piece you have, not the whole sheet
If an edge lifts after cutting, put a little adhesive under that edge and press it again. Don't coat the whole surface to solve one loose corner. If the sheet curls, let the adhesive dry fully, then place it between clean sheets under a flat book; wet glue can transfer to the pressing papers.
A square that looks too busy can receive one plain writing label. A panel with an awkward join can be cut smaller. Photographing a favorite sheet before cutting is also reasonable, but it is optional: this is a source sheet, and the smaller pieces are the intended result.
Check the three-square strip
Set the cut family beside the notebook and confirm that at least one piece fits its intended destination.
Layer
A finished collage alone does not show where the pieces will go.
Add the final detail at the smaller scale
Set each cut piece beside its actual entry before embellishing. A dark mark that felt small on the full sheet may dominate a five-centimeter square. Add a date, a short line, or nothing, depending on what the page already contains.
Keep the reverse plain if you want to write on it. For a long strip, try dividing it into labels only when those labels are needed. If you want a repeated tile arrangement rather than mixed shapes, the serendipity-squares guide develops that next step without asking you to build another whole sheet.
Finish by using one piece
The first finished piece belongs on a page, not back in the scrap pile. Attach the piece that already has a destination, add the words it supports, and close the notebook gently. Check that the new layer bends with the page and doesn't create a stiff ledge beside your writing.
Keep the remaining pieces in one envelope labeled with their dominant colors and approximate size. Stop once the cut pieces are dry, usable, and together. Next time you need a small panel, look here before starting another masterboard; using the family is part of making it.
Where this idea began
Want to follow the idea further? These community discussions and maker references are a good place to start.
- A masterboard cut into journal cards and pockets
The maker describes covering packaging with scraps, marking the reverse, and cutting coordinated pieces.
- Masterboards: a walk-through tutorial
The tutorial demonstrates making a decorated source sheet and explains its later use in smaller paper projects.